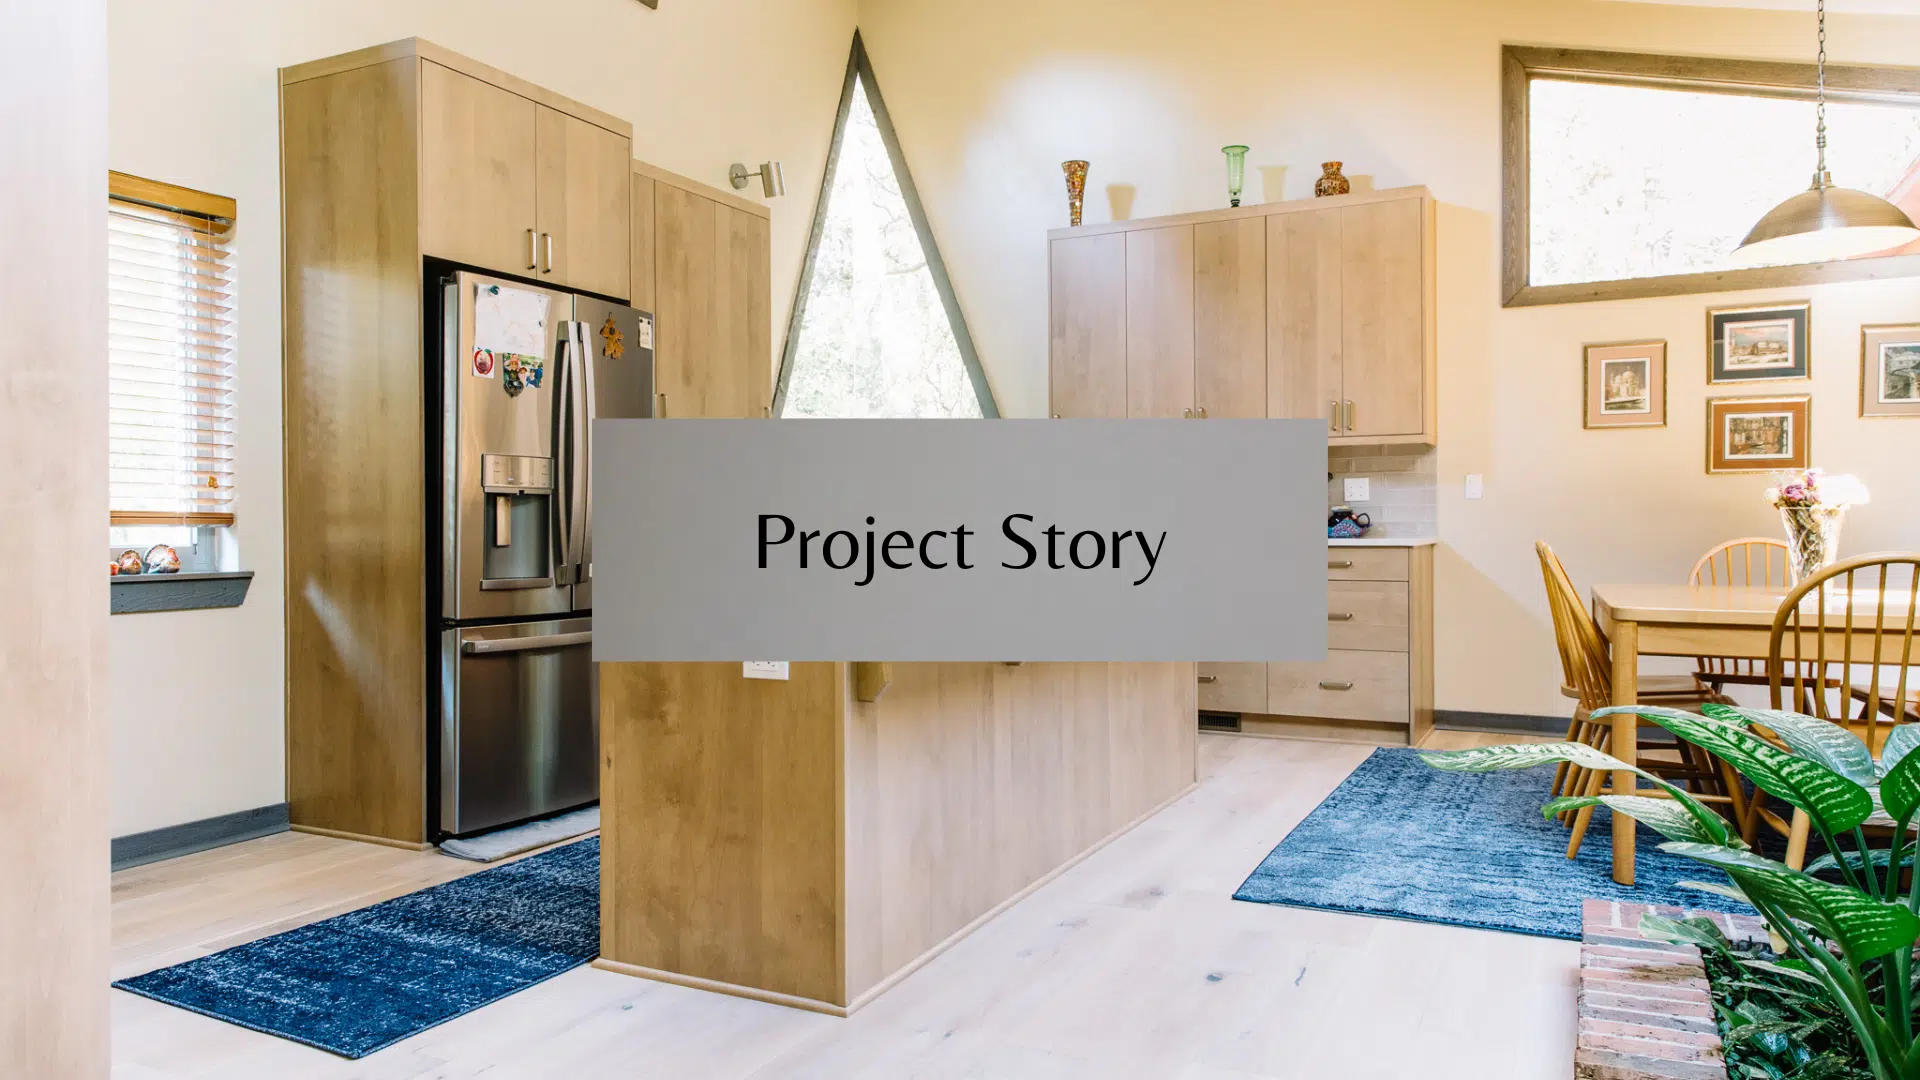
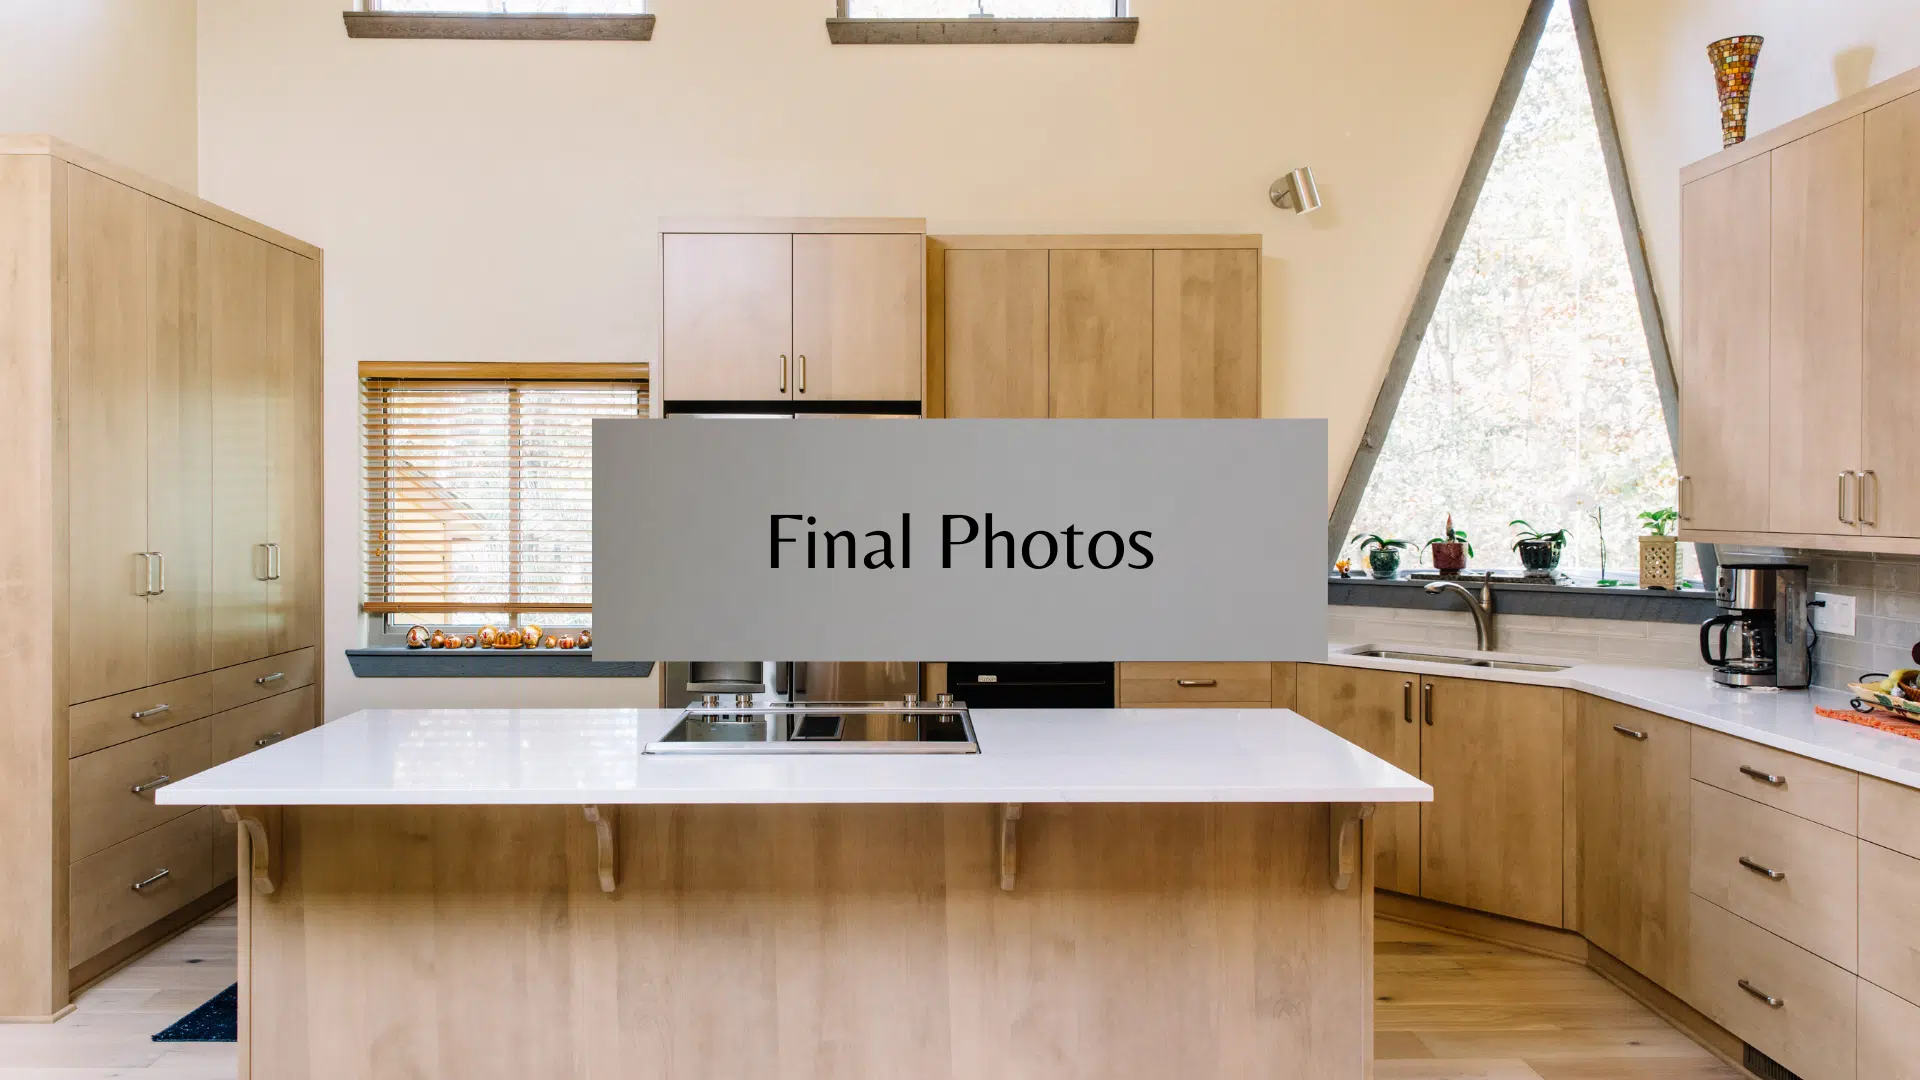
Creating An Open Kitchen
Lakeshore Area, Tallahassee- Removed Wall Separating Kitchen
- New flooring
- Minor Update for Two Bathrooms
- Total Cost: $111,877.61
Designer: Kristi Williams

McManus Kitchen and Bath is the only licensed contractor in Tallahassee with a full service kitchen and bath showroom. We’re committed to reducing the every day stress and hassle people experience in their homes by helping them remodel with thoughtful designs and a worry free remodeling process. Click here to schedule a consult.
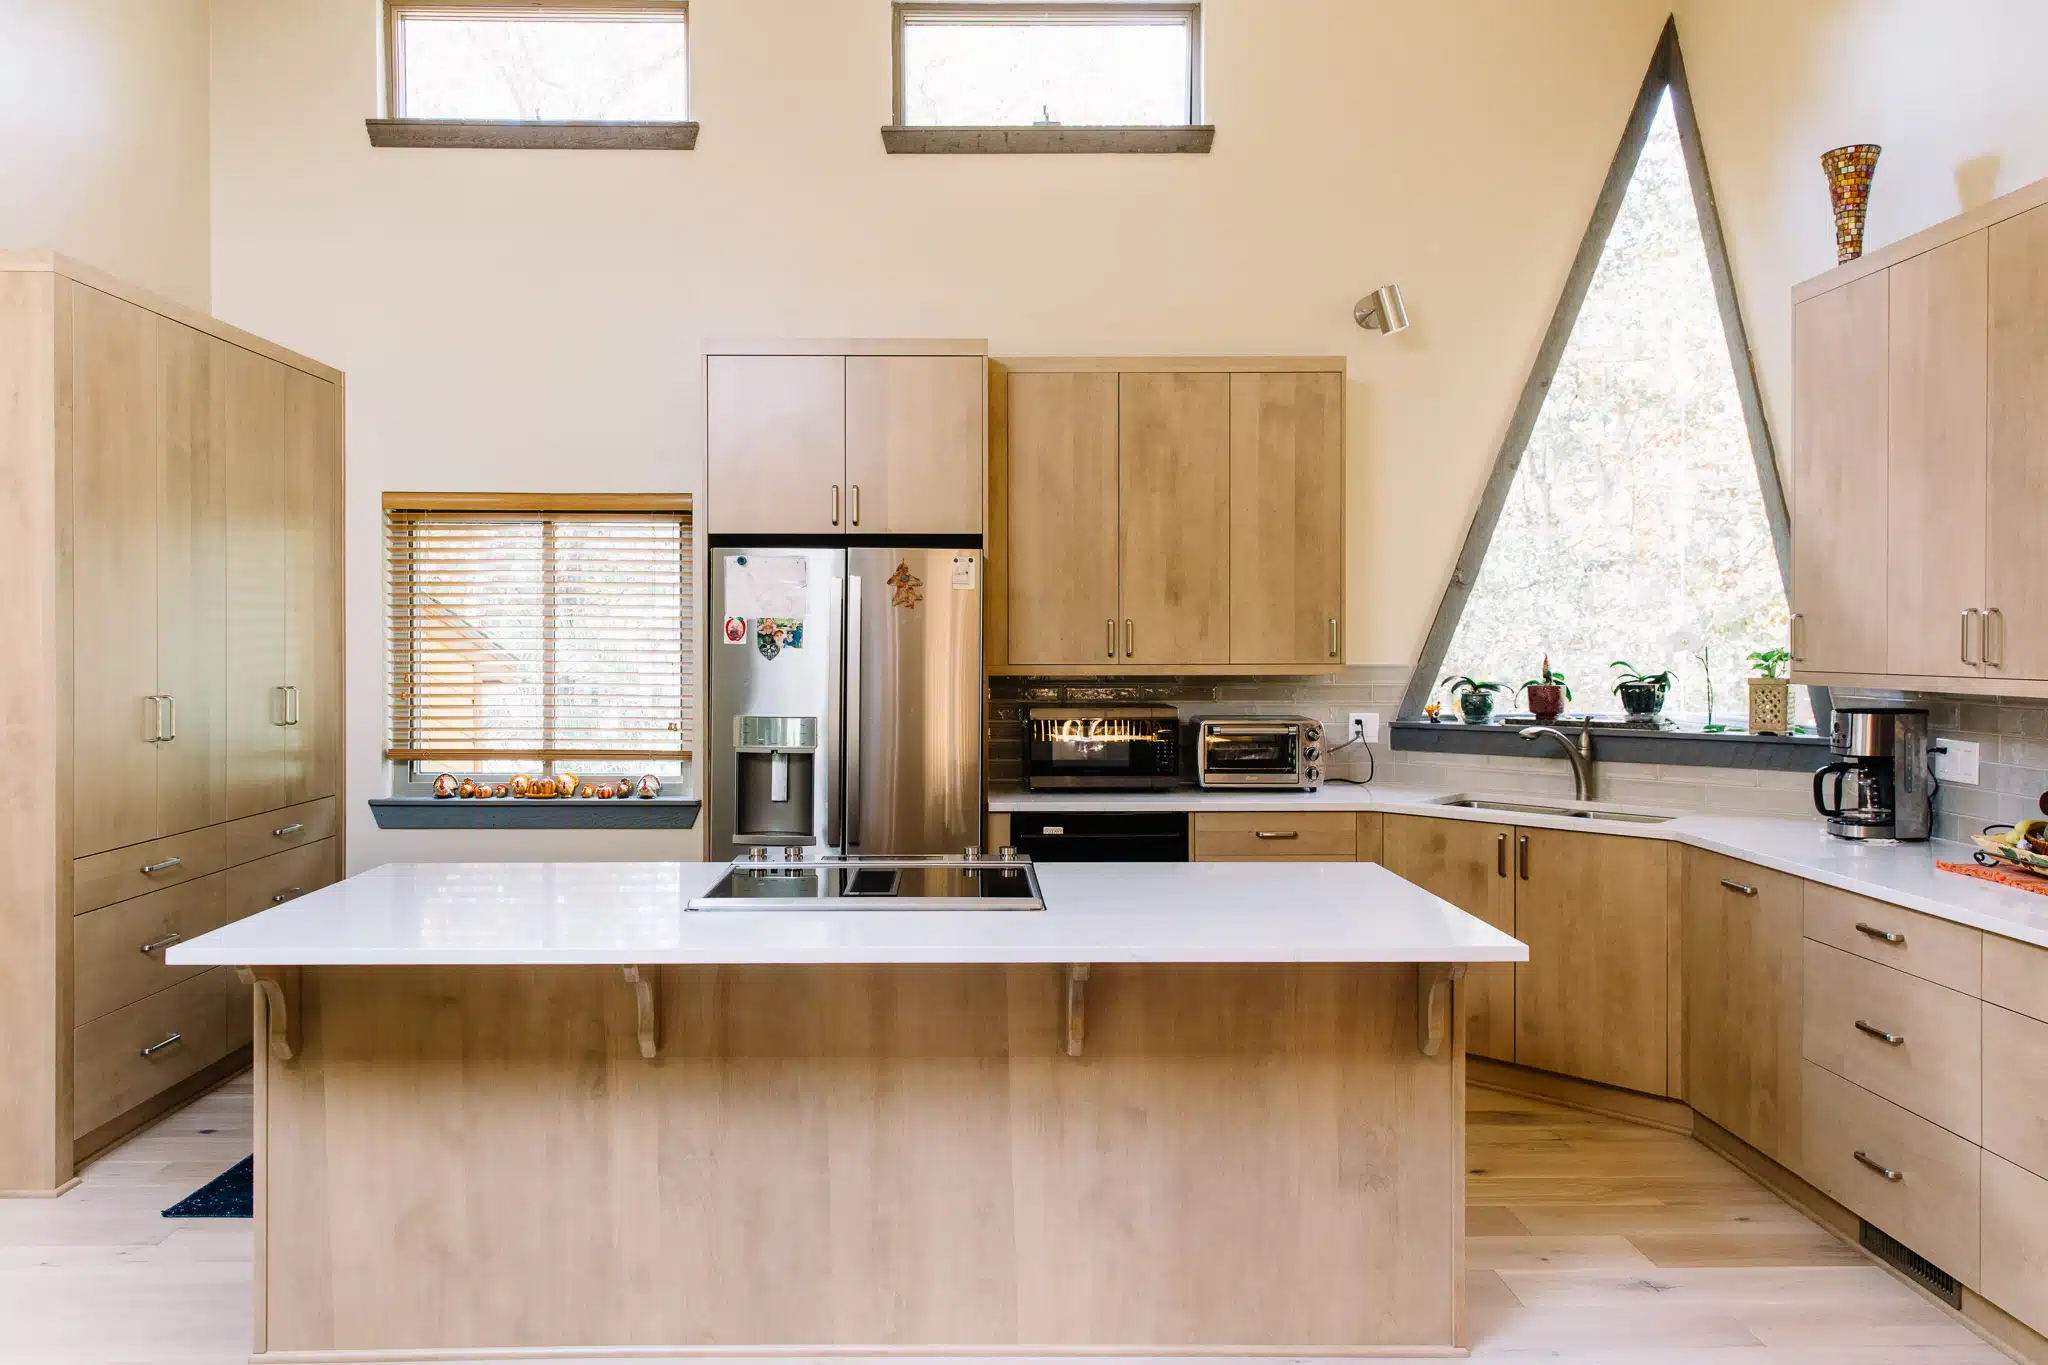
Creating An Open Kitchen: Project Overview
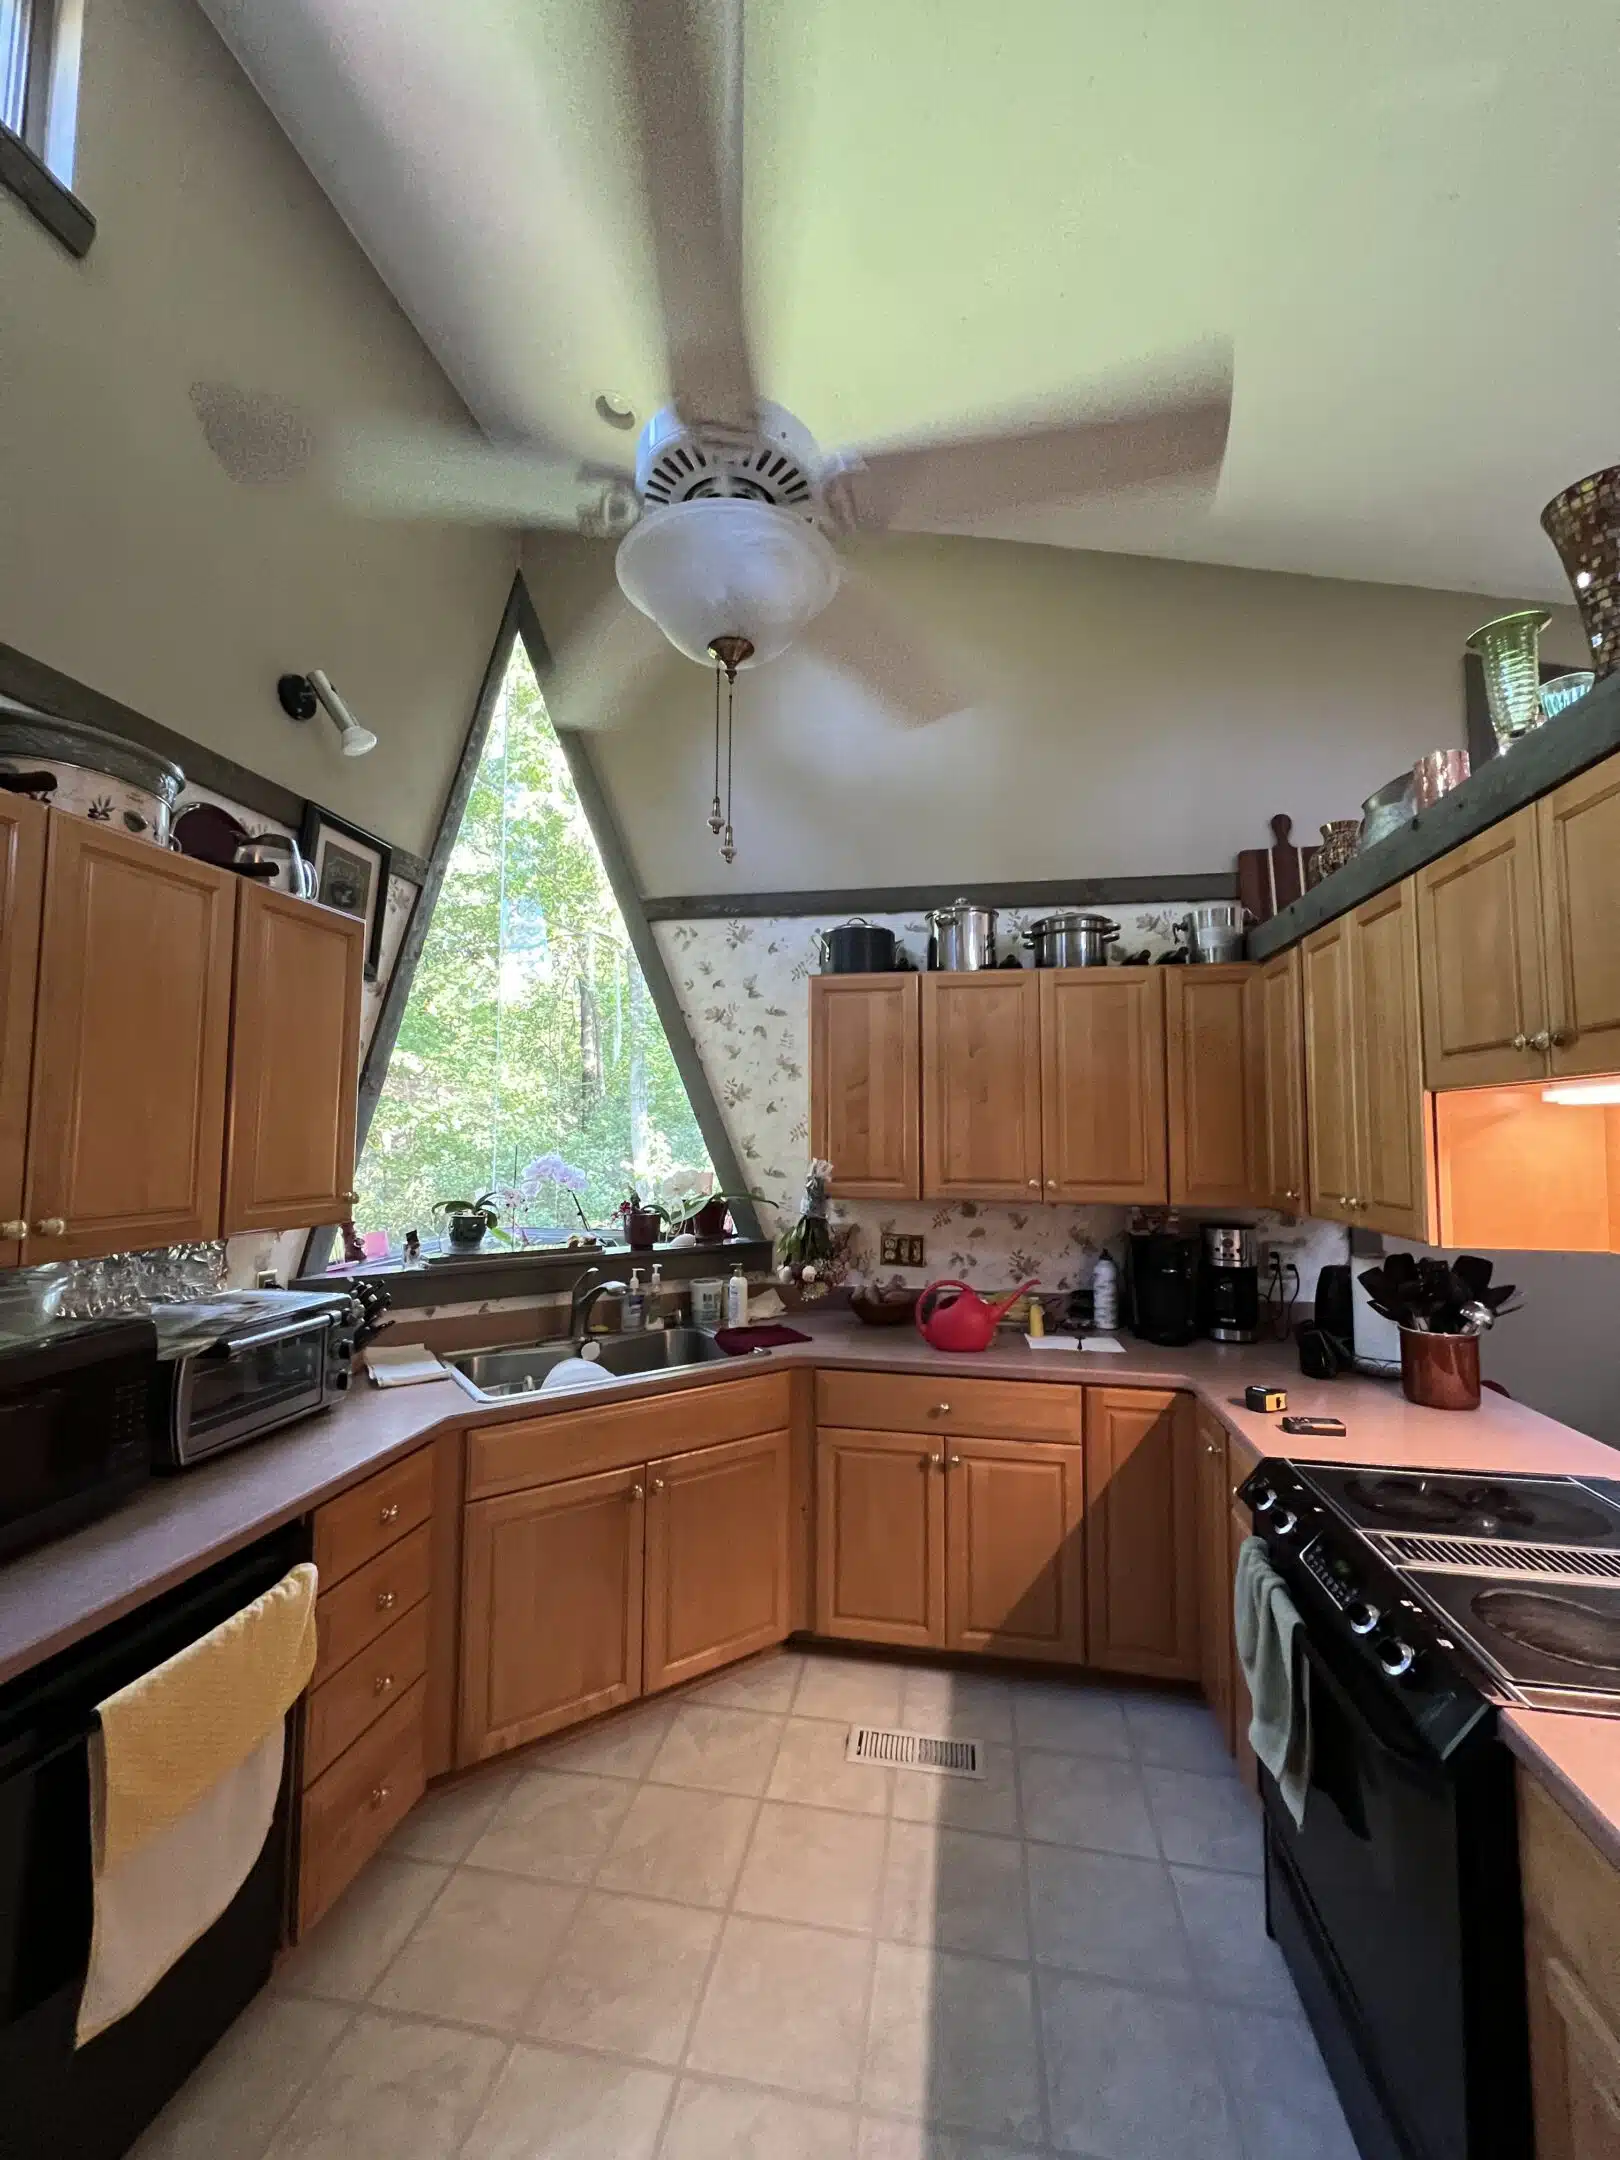
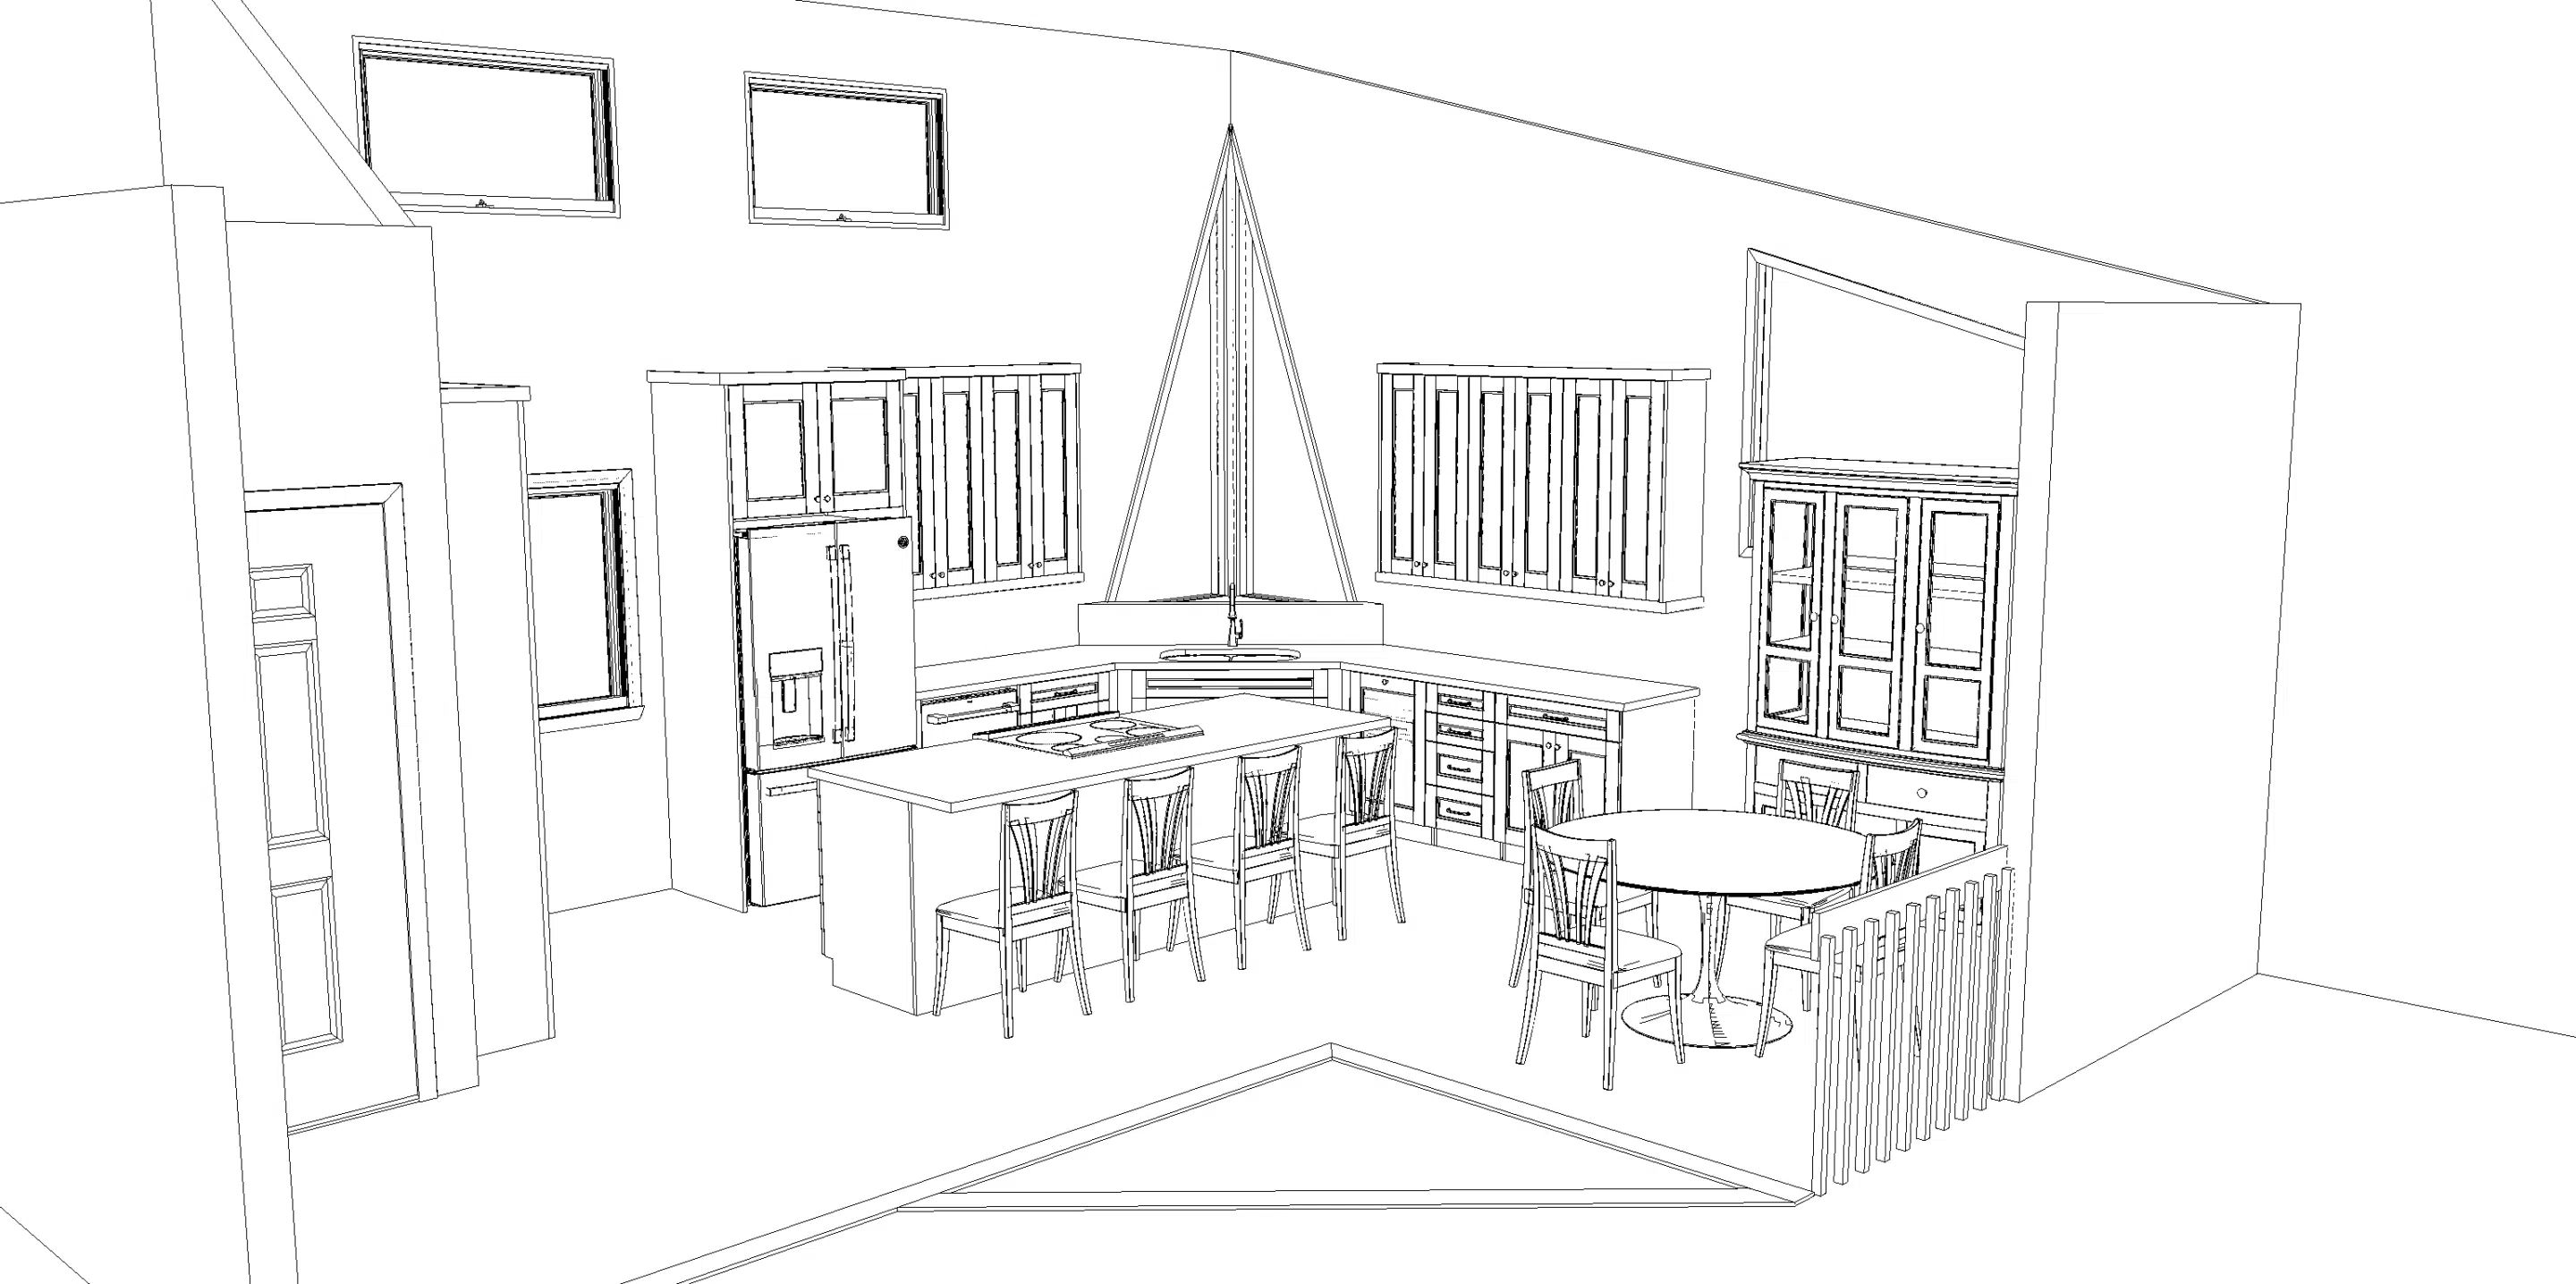
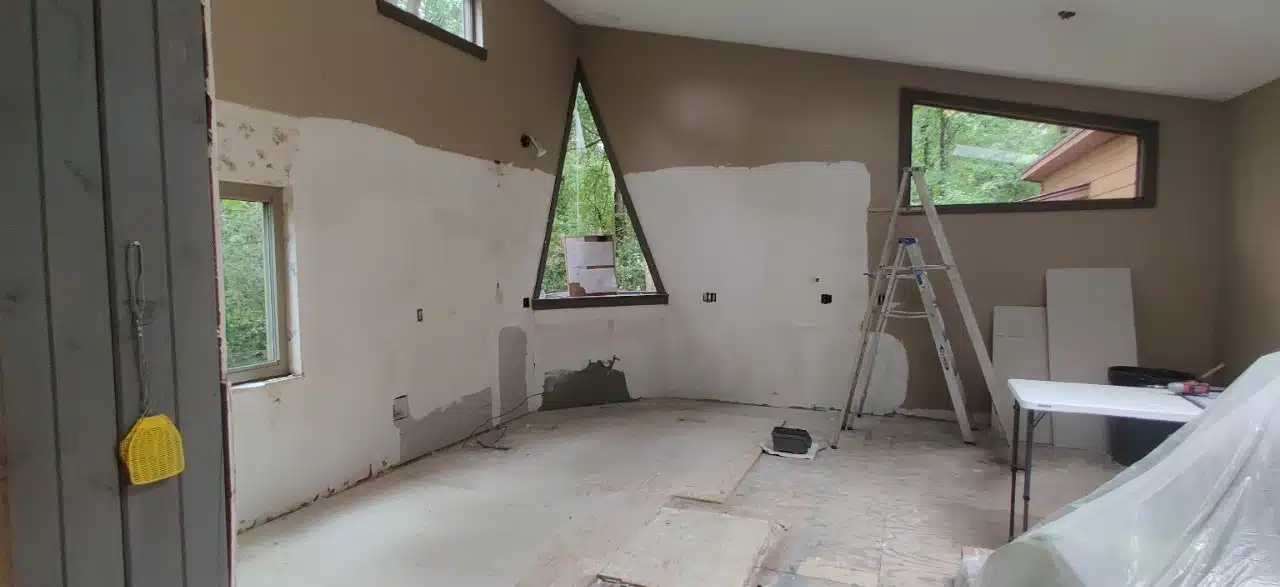
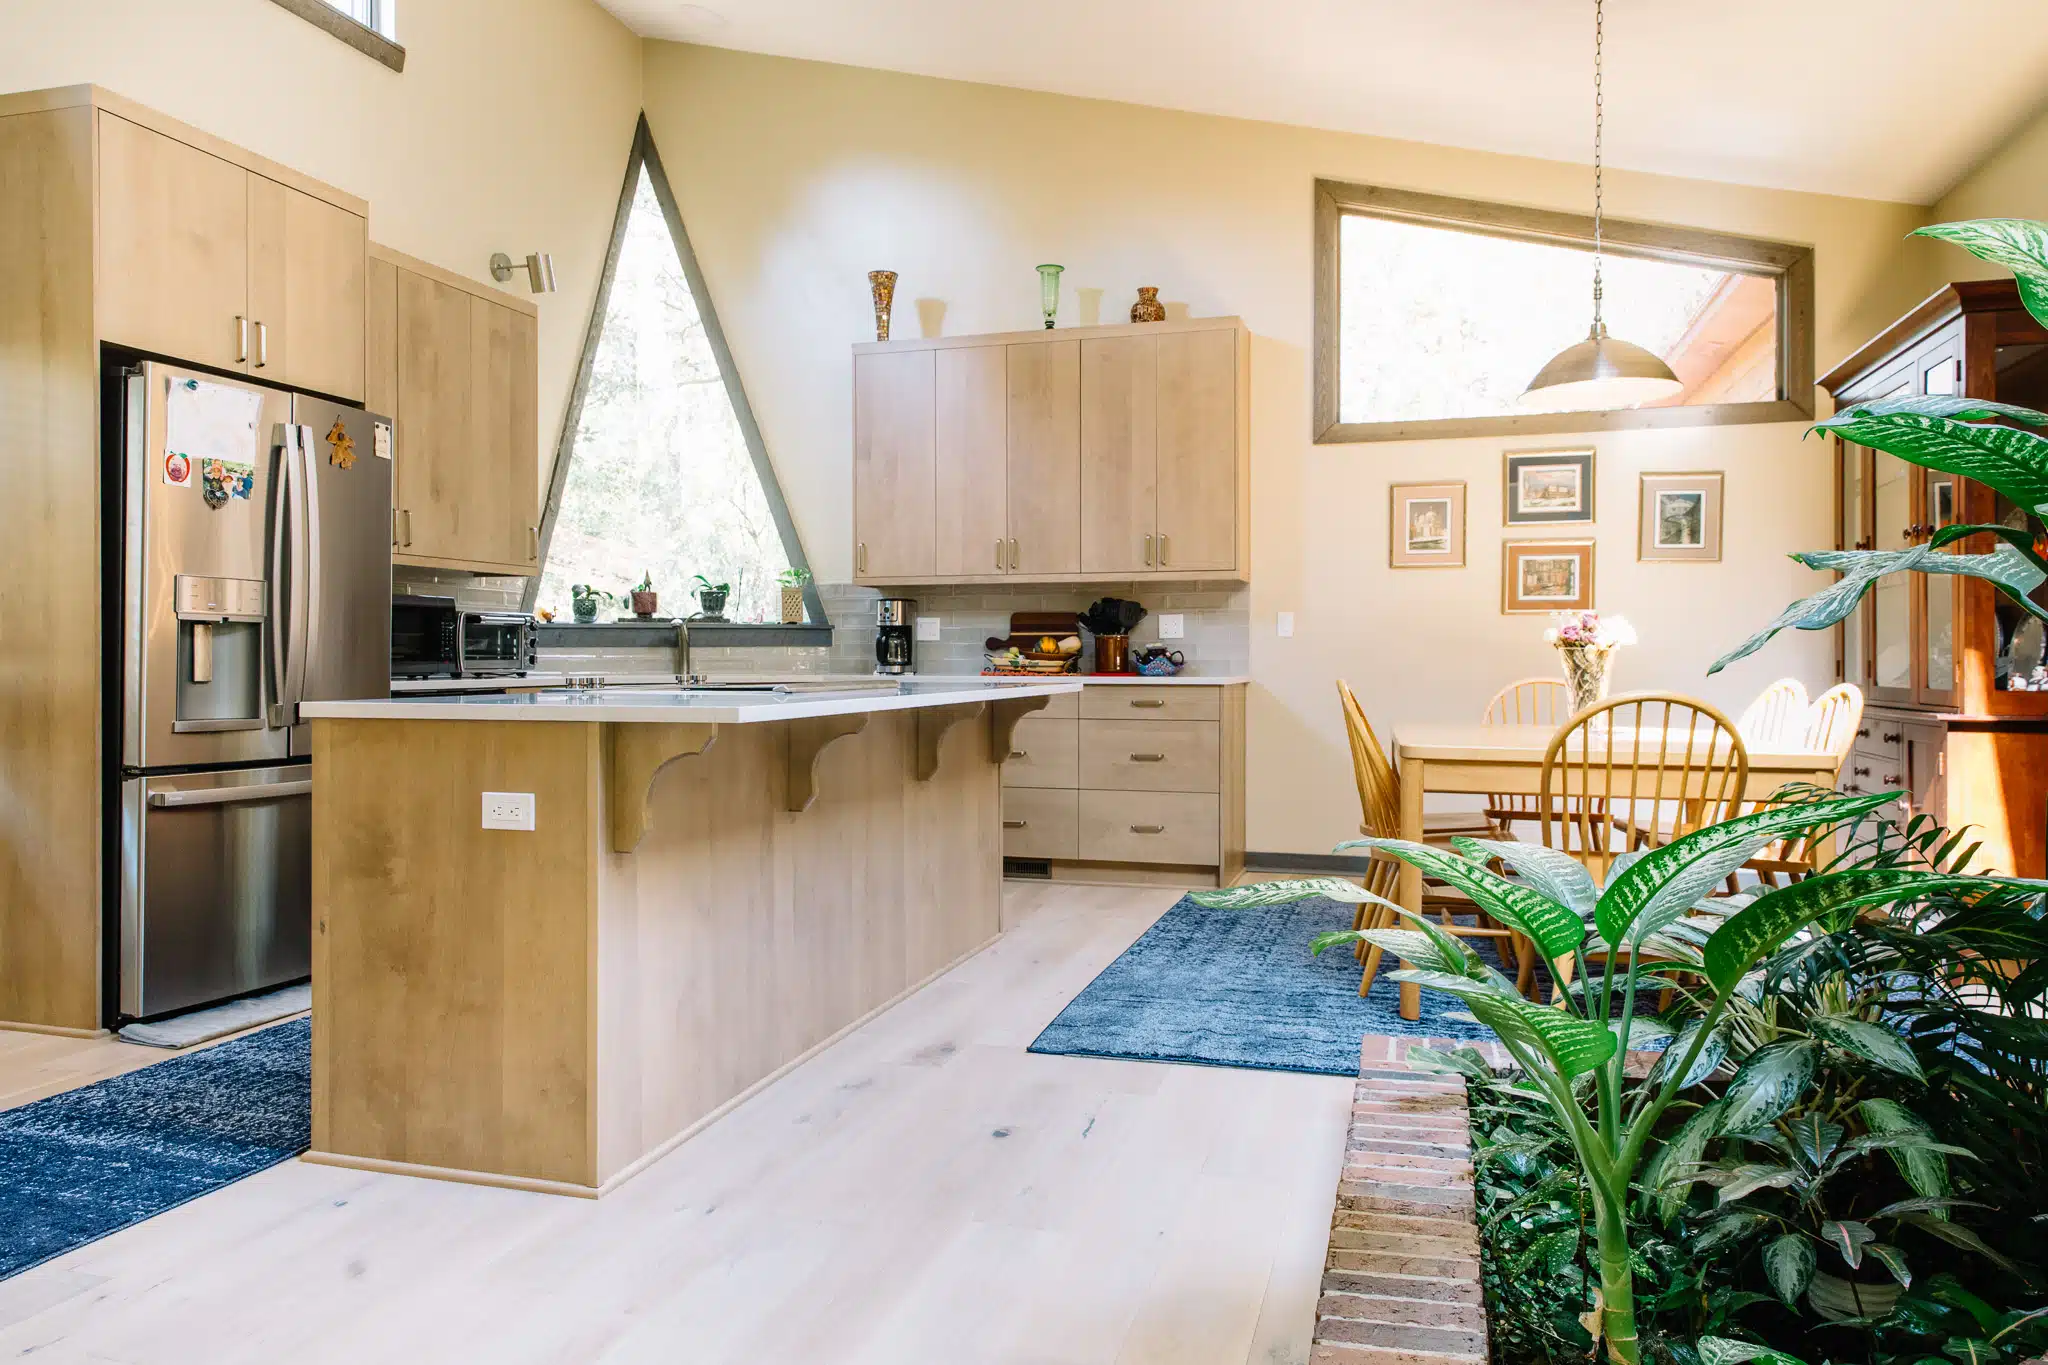
Creating an open kitchen is little less common these days than it has in the past but this home was made for it. The kitchen is on a separate level from the living area so it already has some separation. And opening it up allowed for better seating in the dining room.
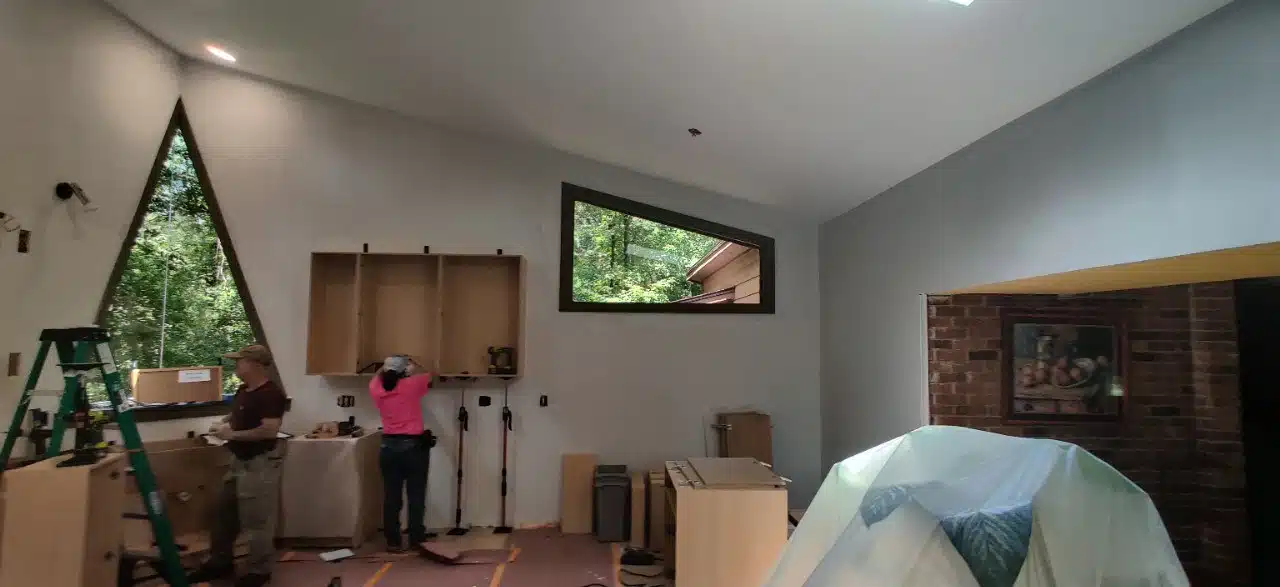
Removing the wall that partitioned the kitchen from the rest of the house let the natural light shine through their triangula window and created a great focal point for the design. It makes a create space to entertain or just feel more connect to the livign areas while you are cooking.
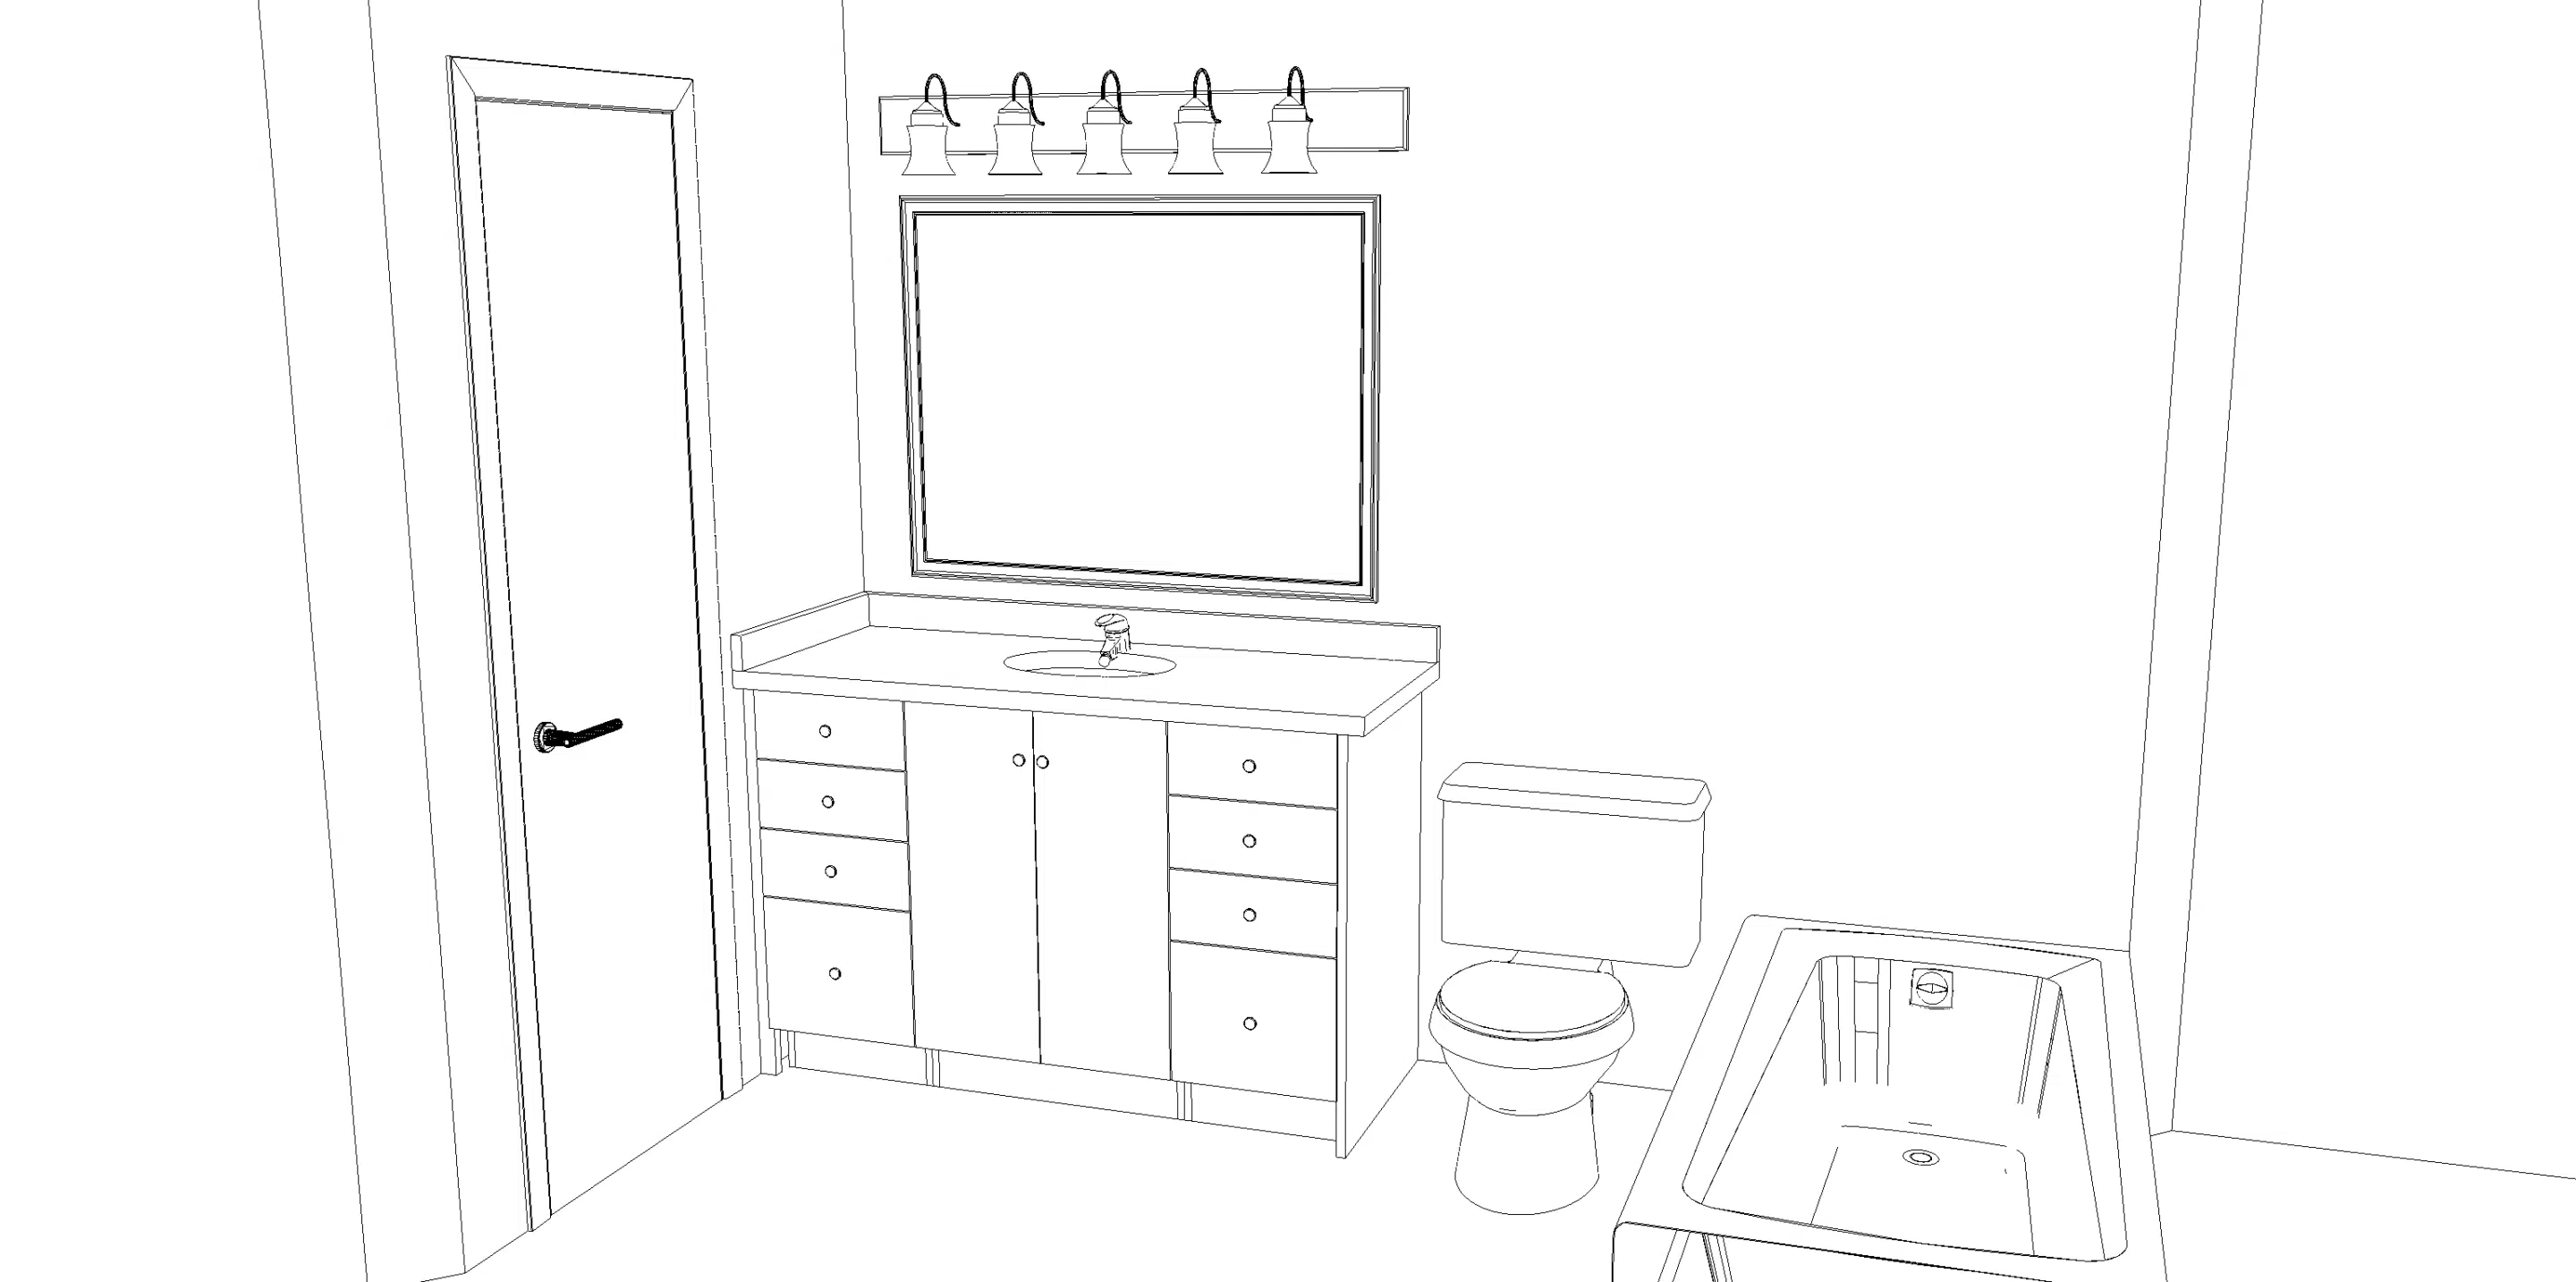
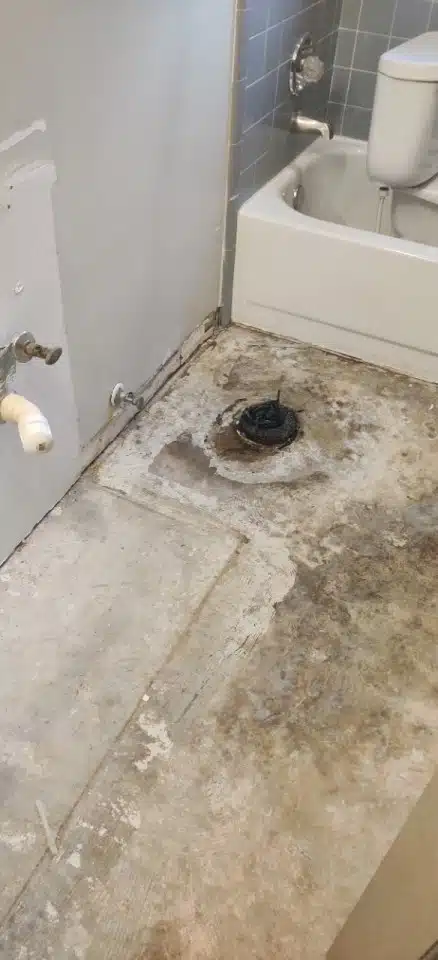
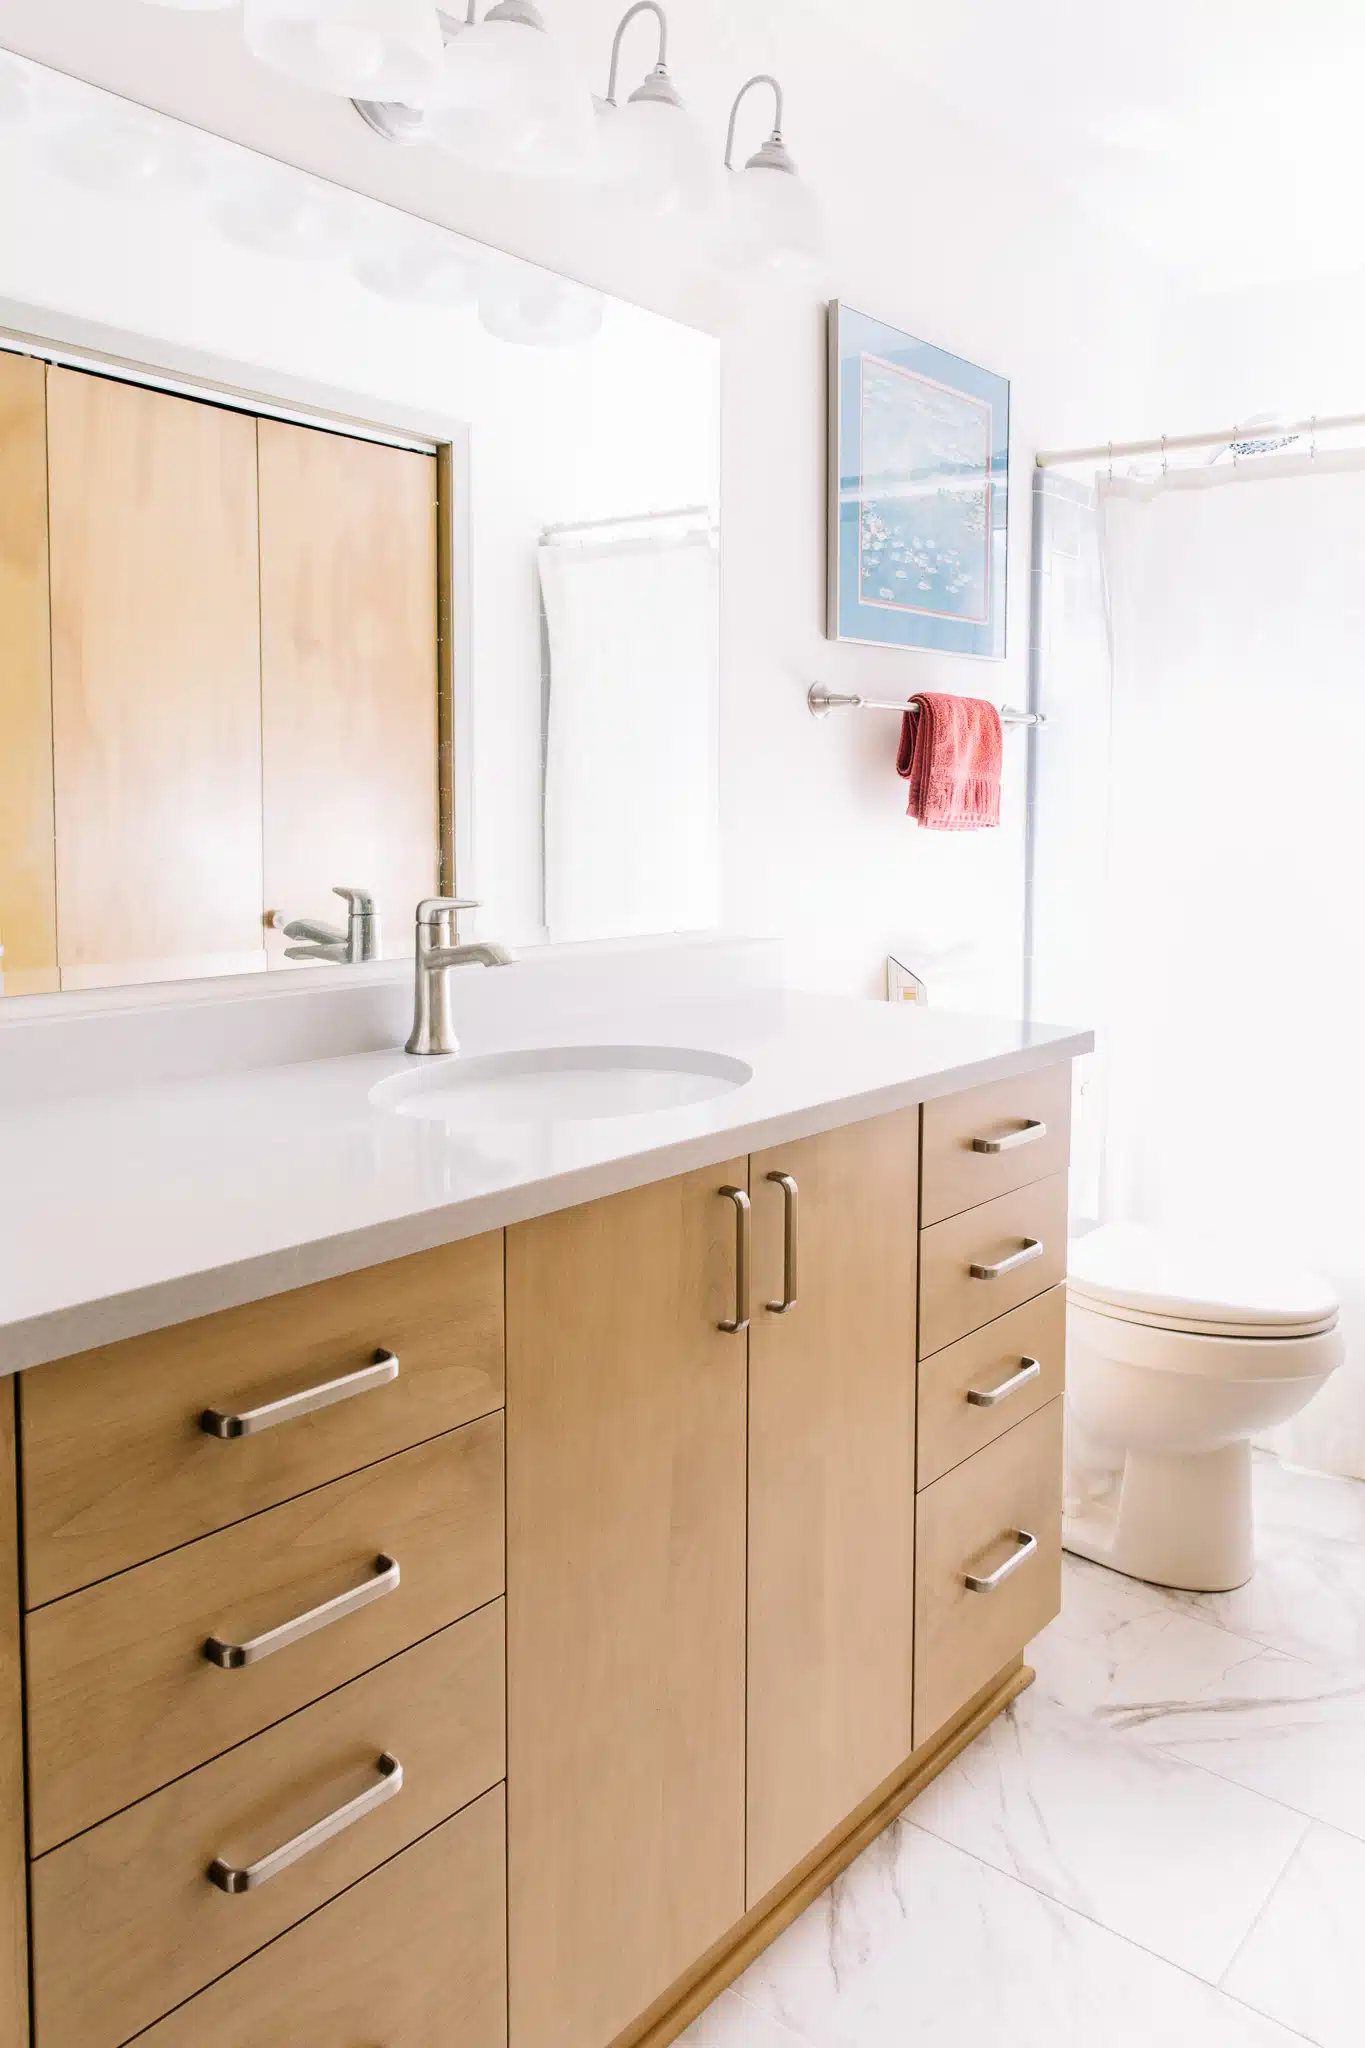
In the guest and master baths, the homeowners wanted to refresh the look without going as far as a full remodel. In the guest bath, we installed new floor tile and repalced the vanity. In the primary bath we installed a larger vanity for more storage.
Before vs After
Drag the slider to see the transformation of this kitchen
Creating an open kitchen by removing walls made a huge difference!
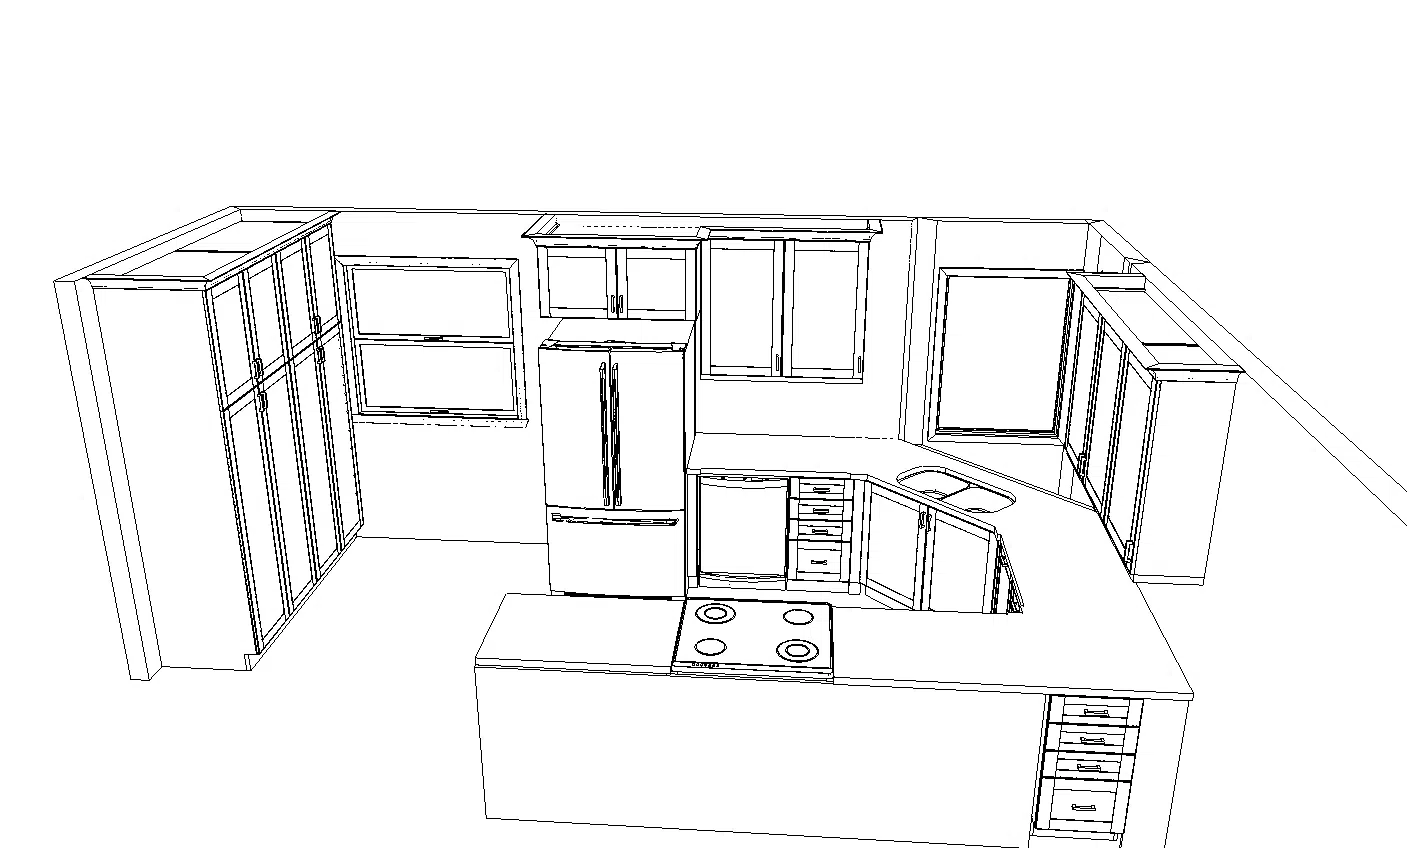
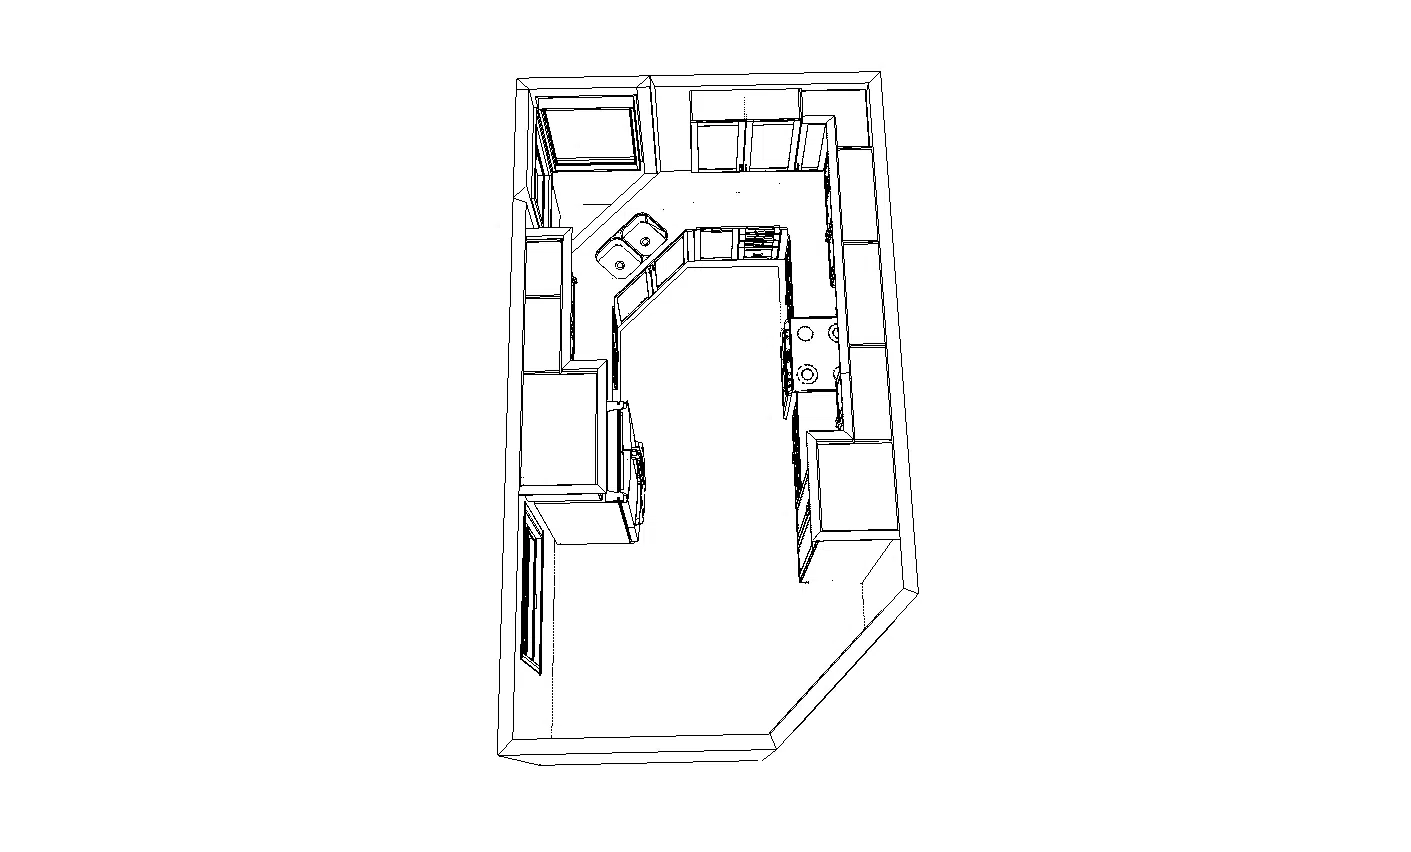
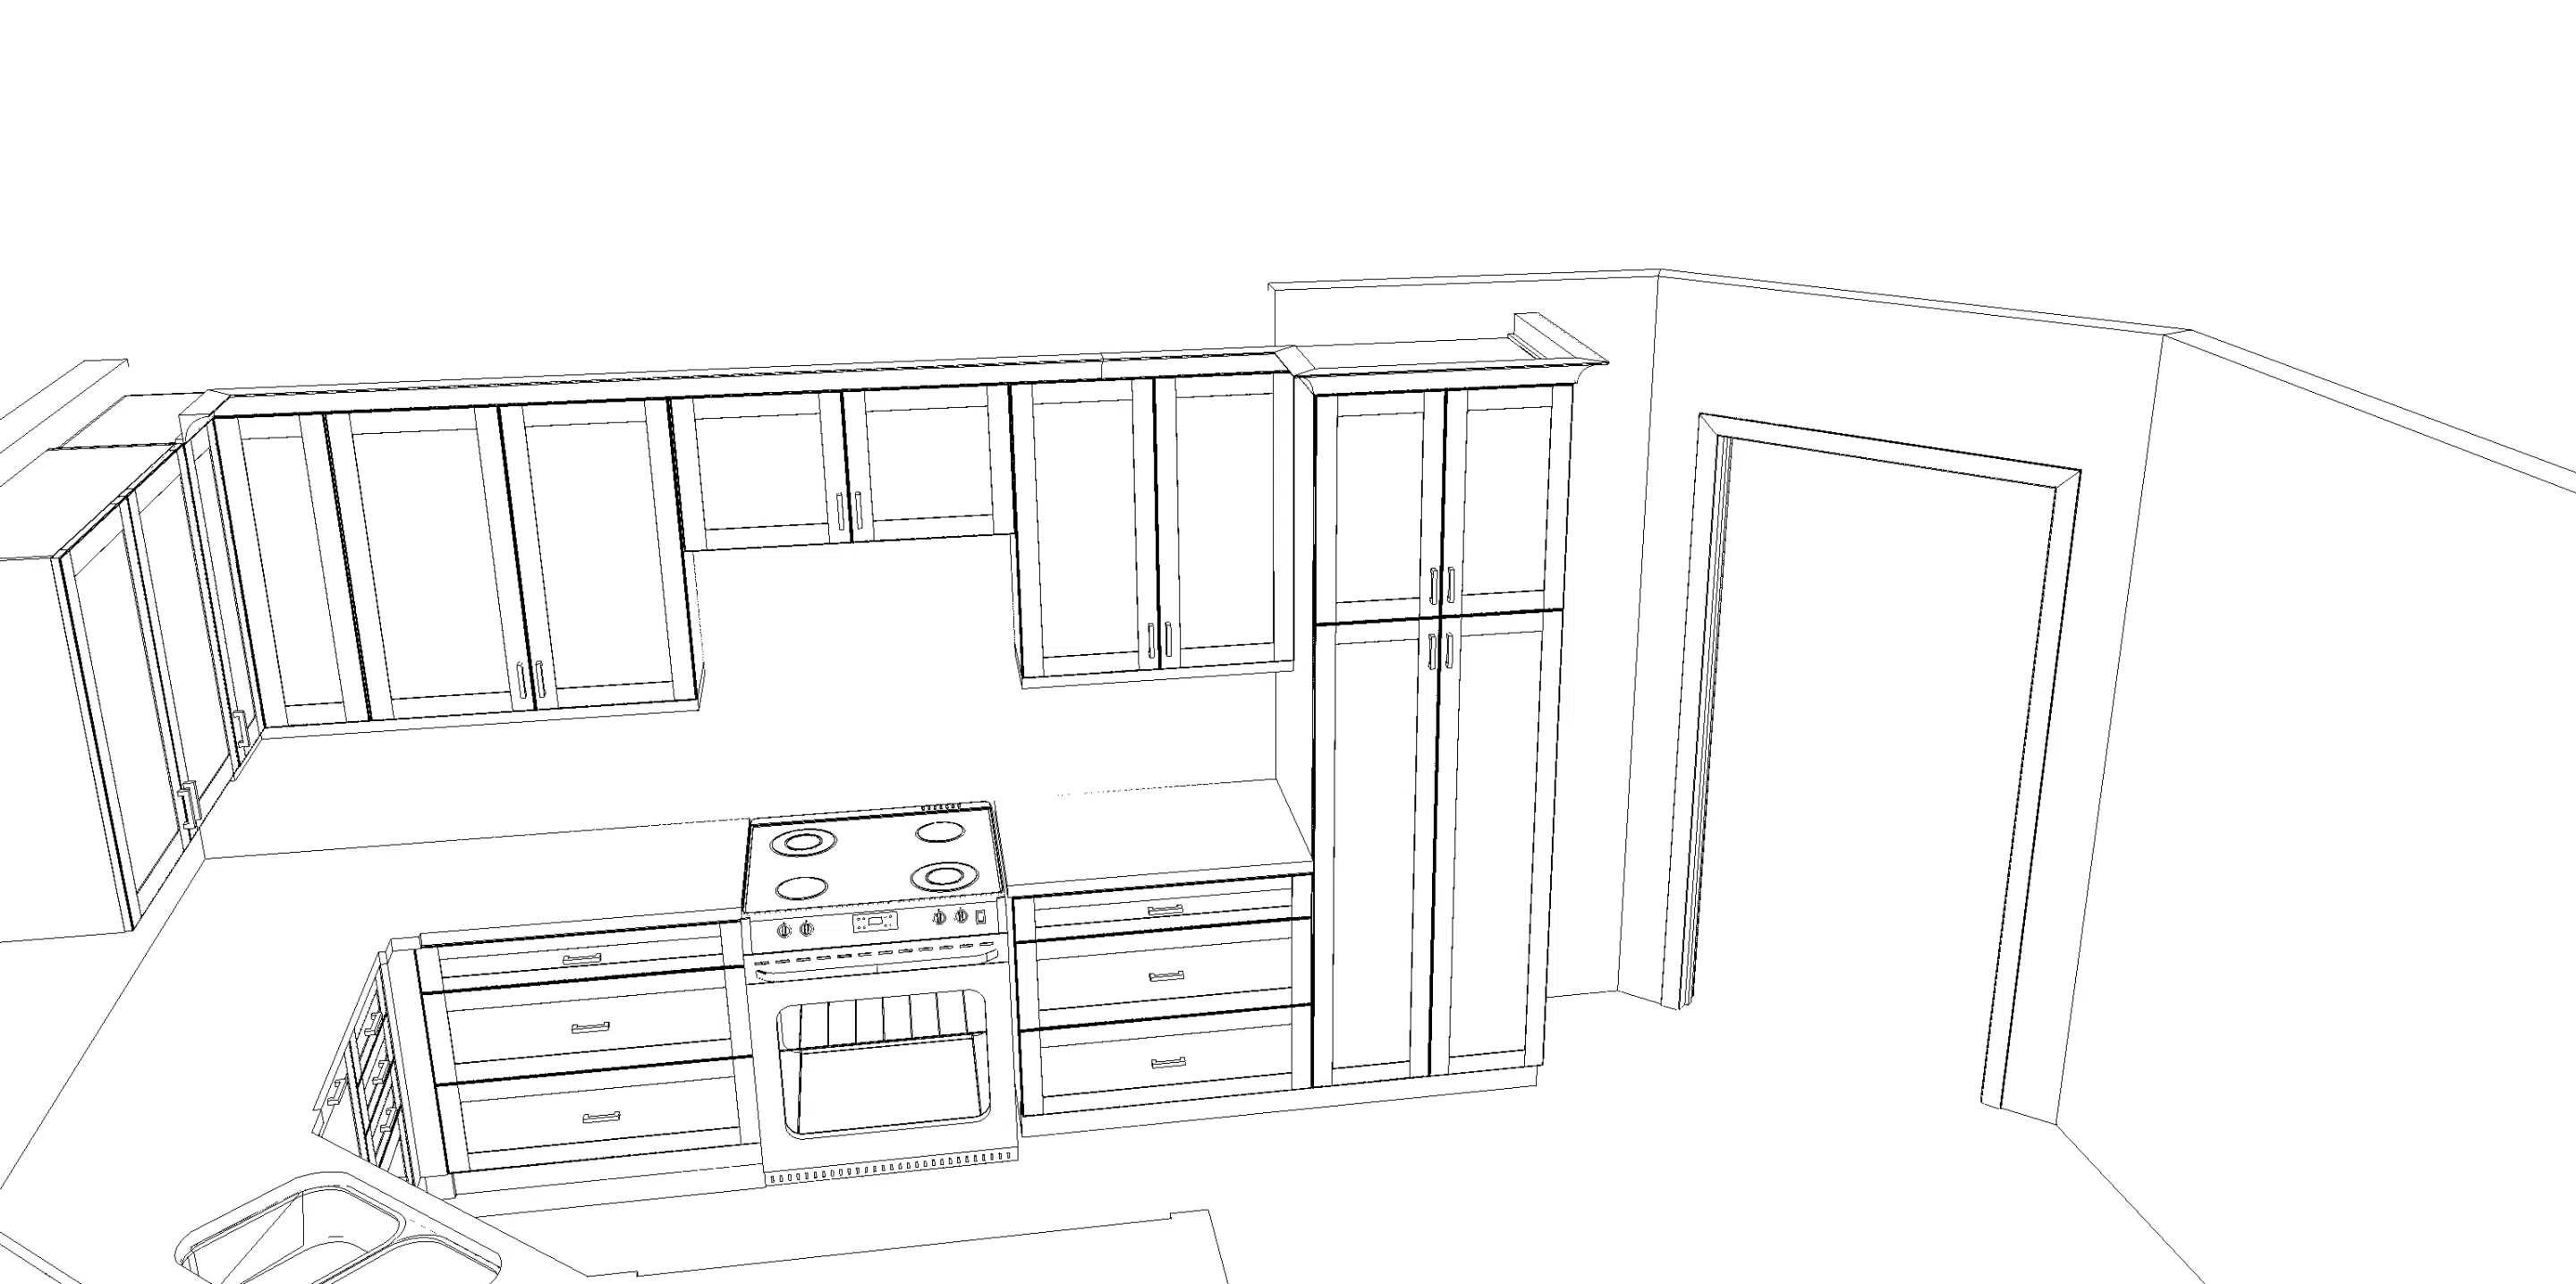
Before / After Floorplan

Before Floor Plan

After Floor Plan
Removing the wall and creating an open kitchen created a completely different space.
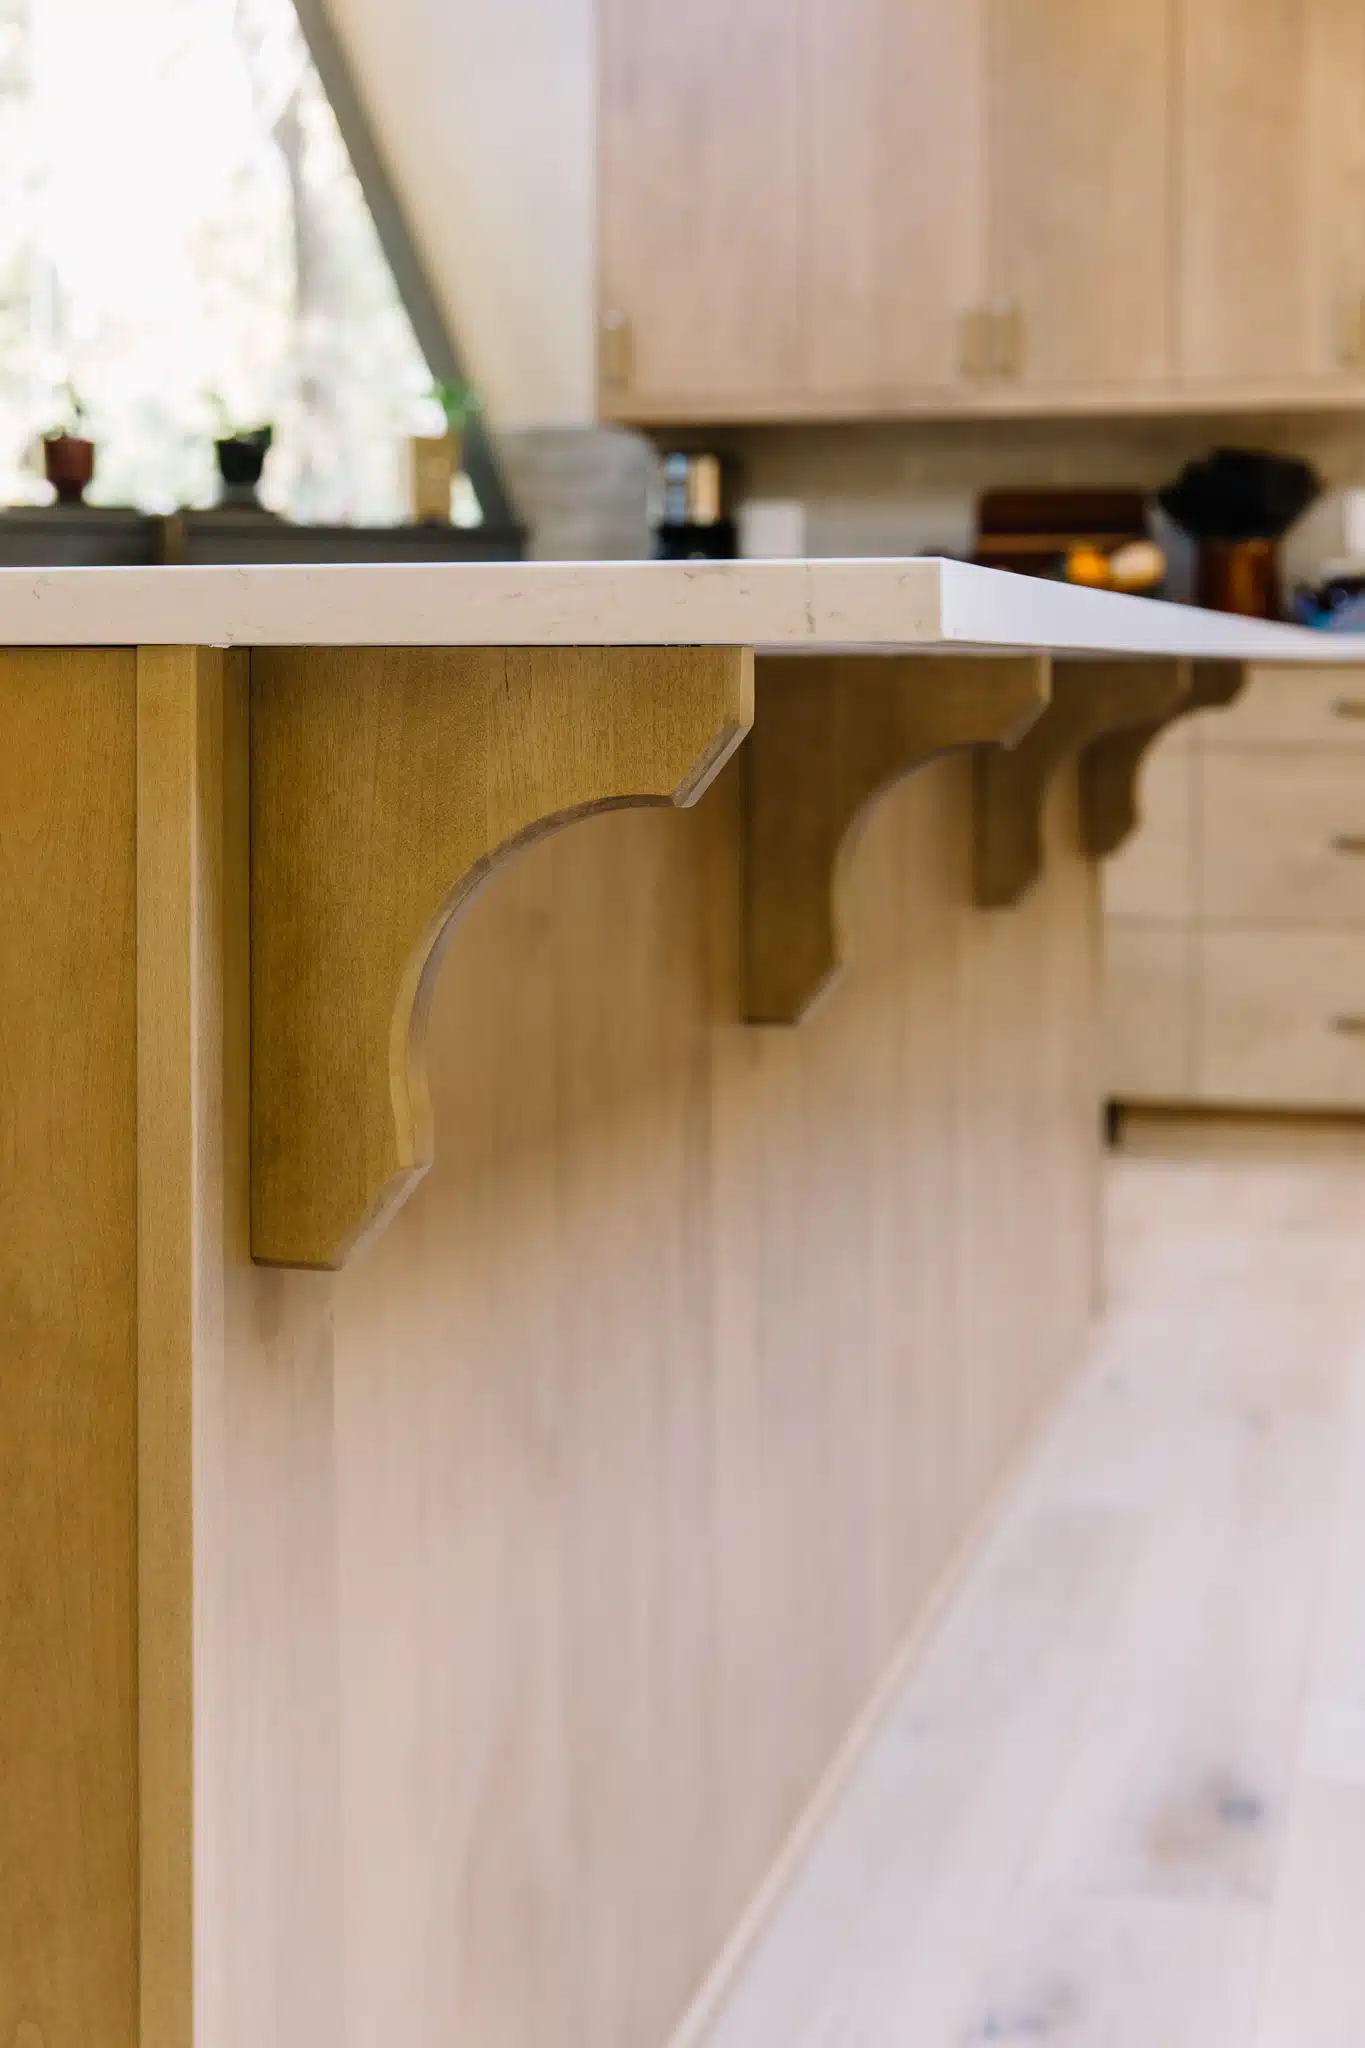
Our Favorite Updates
A remodel is a unique expression of the homeowner’s tastes. Here are a few of our favorite features from this particular remodel!
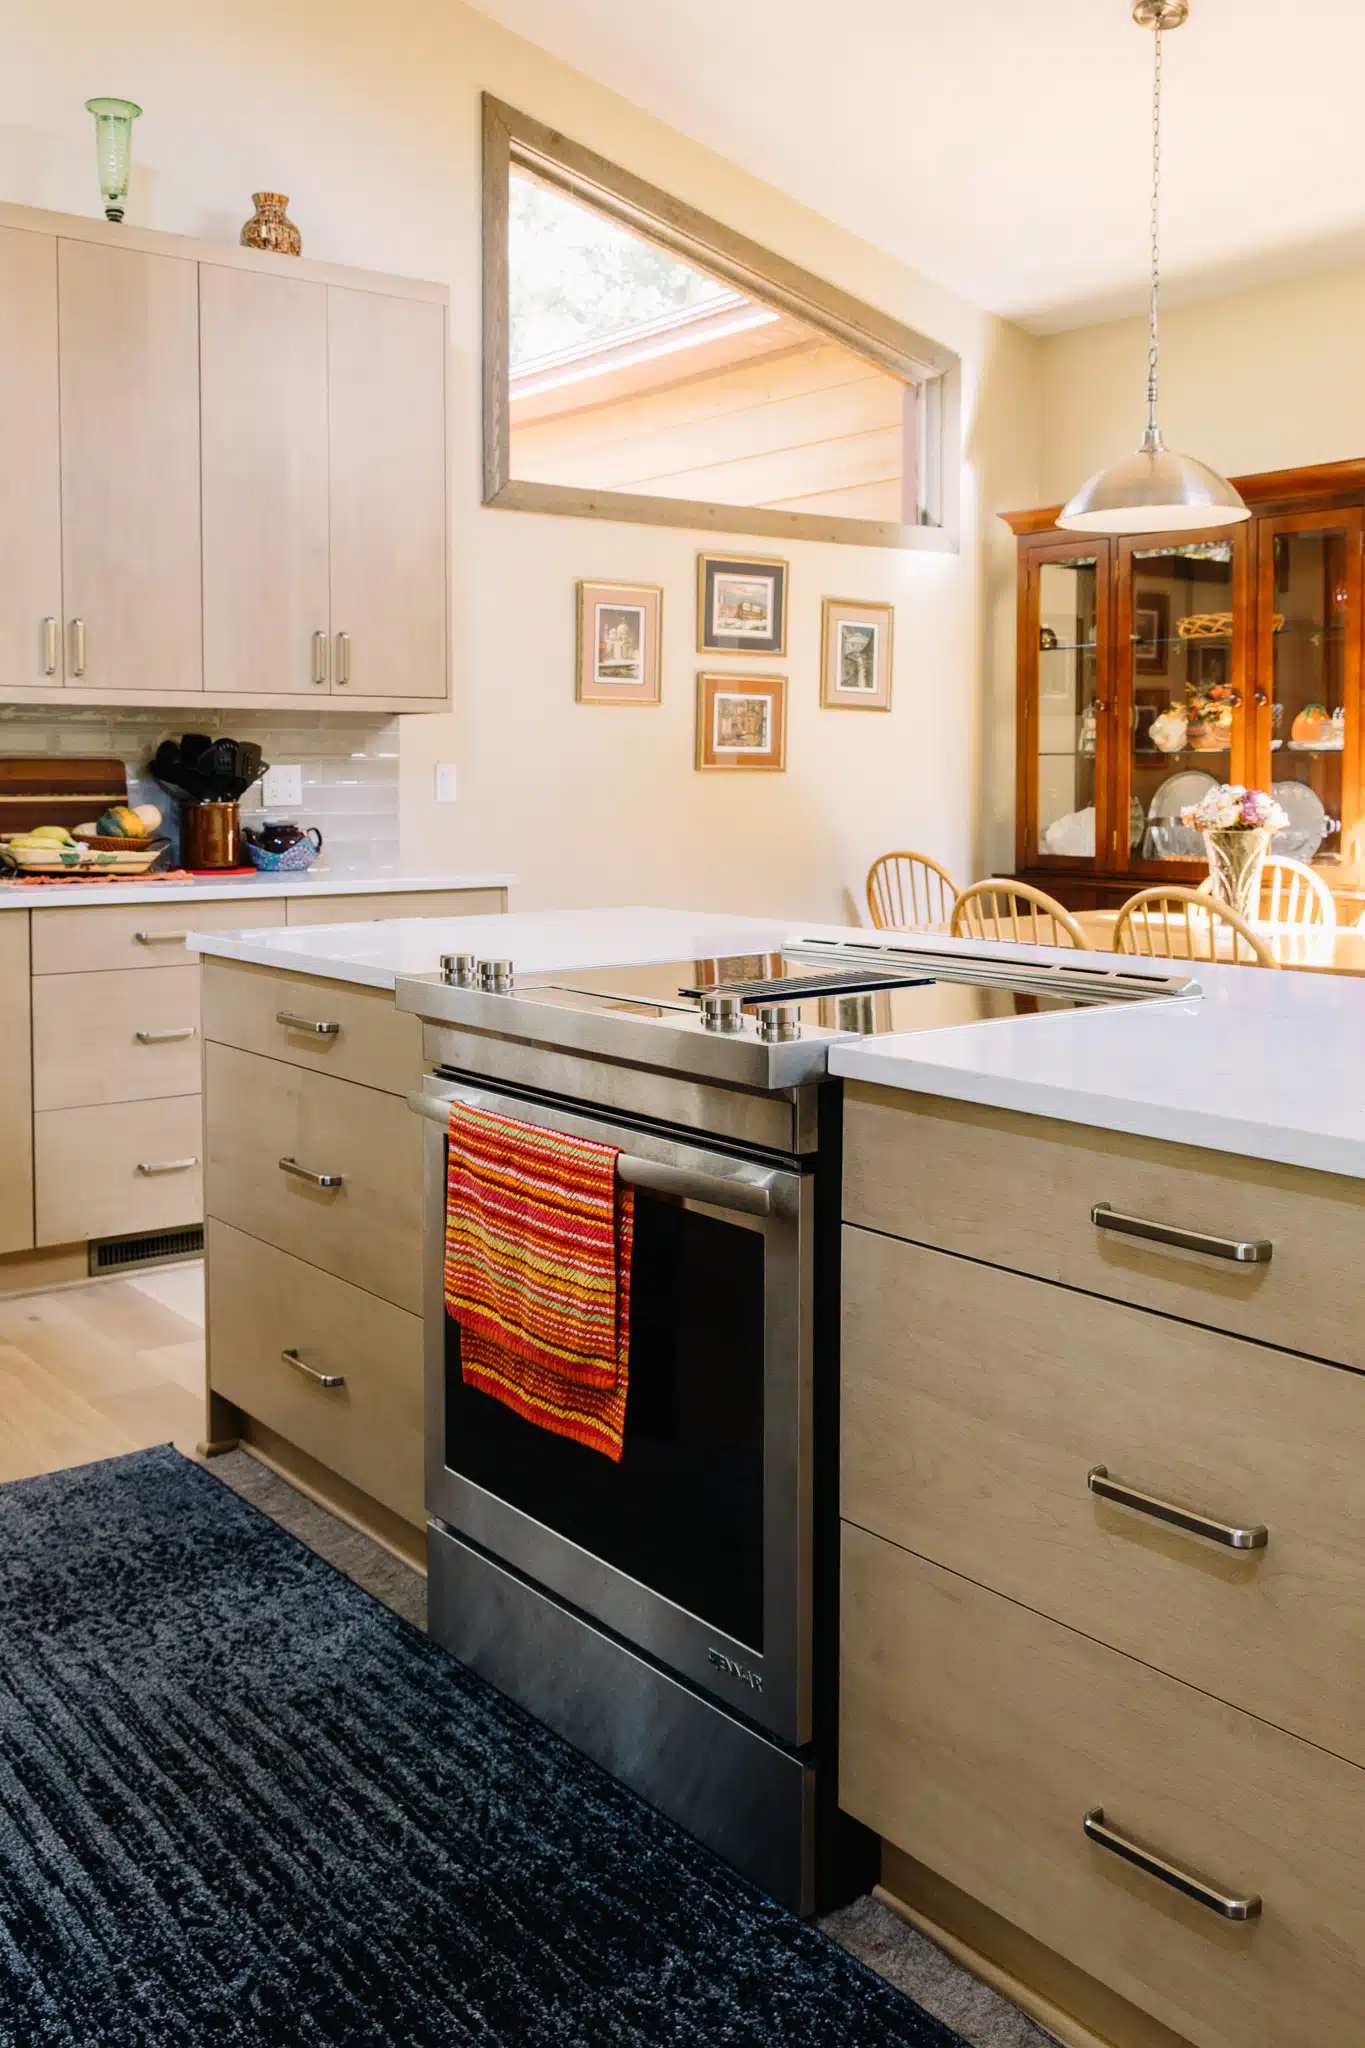
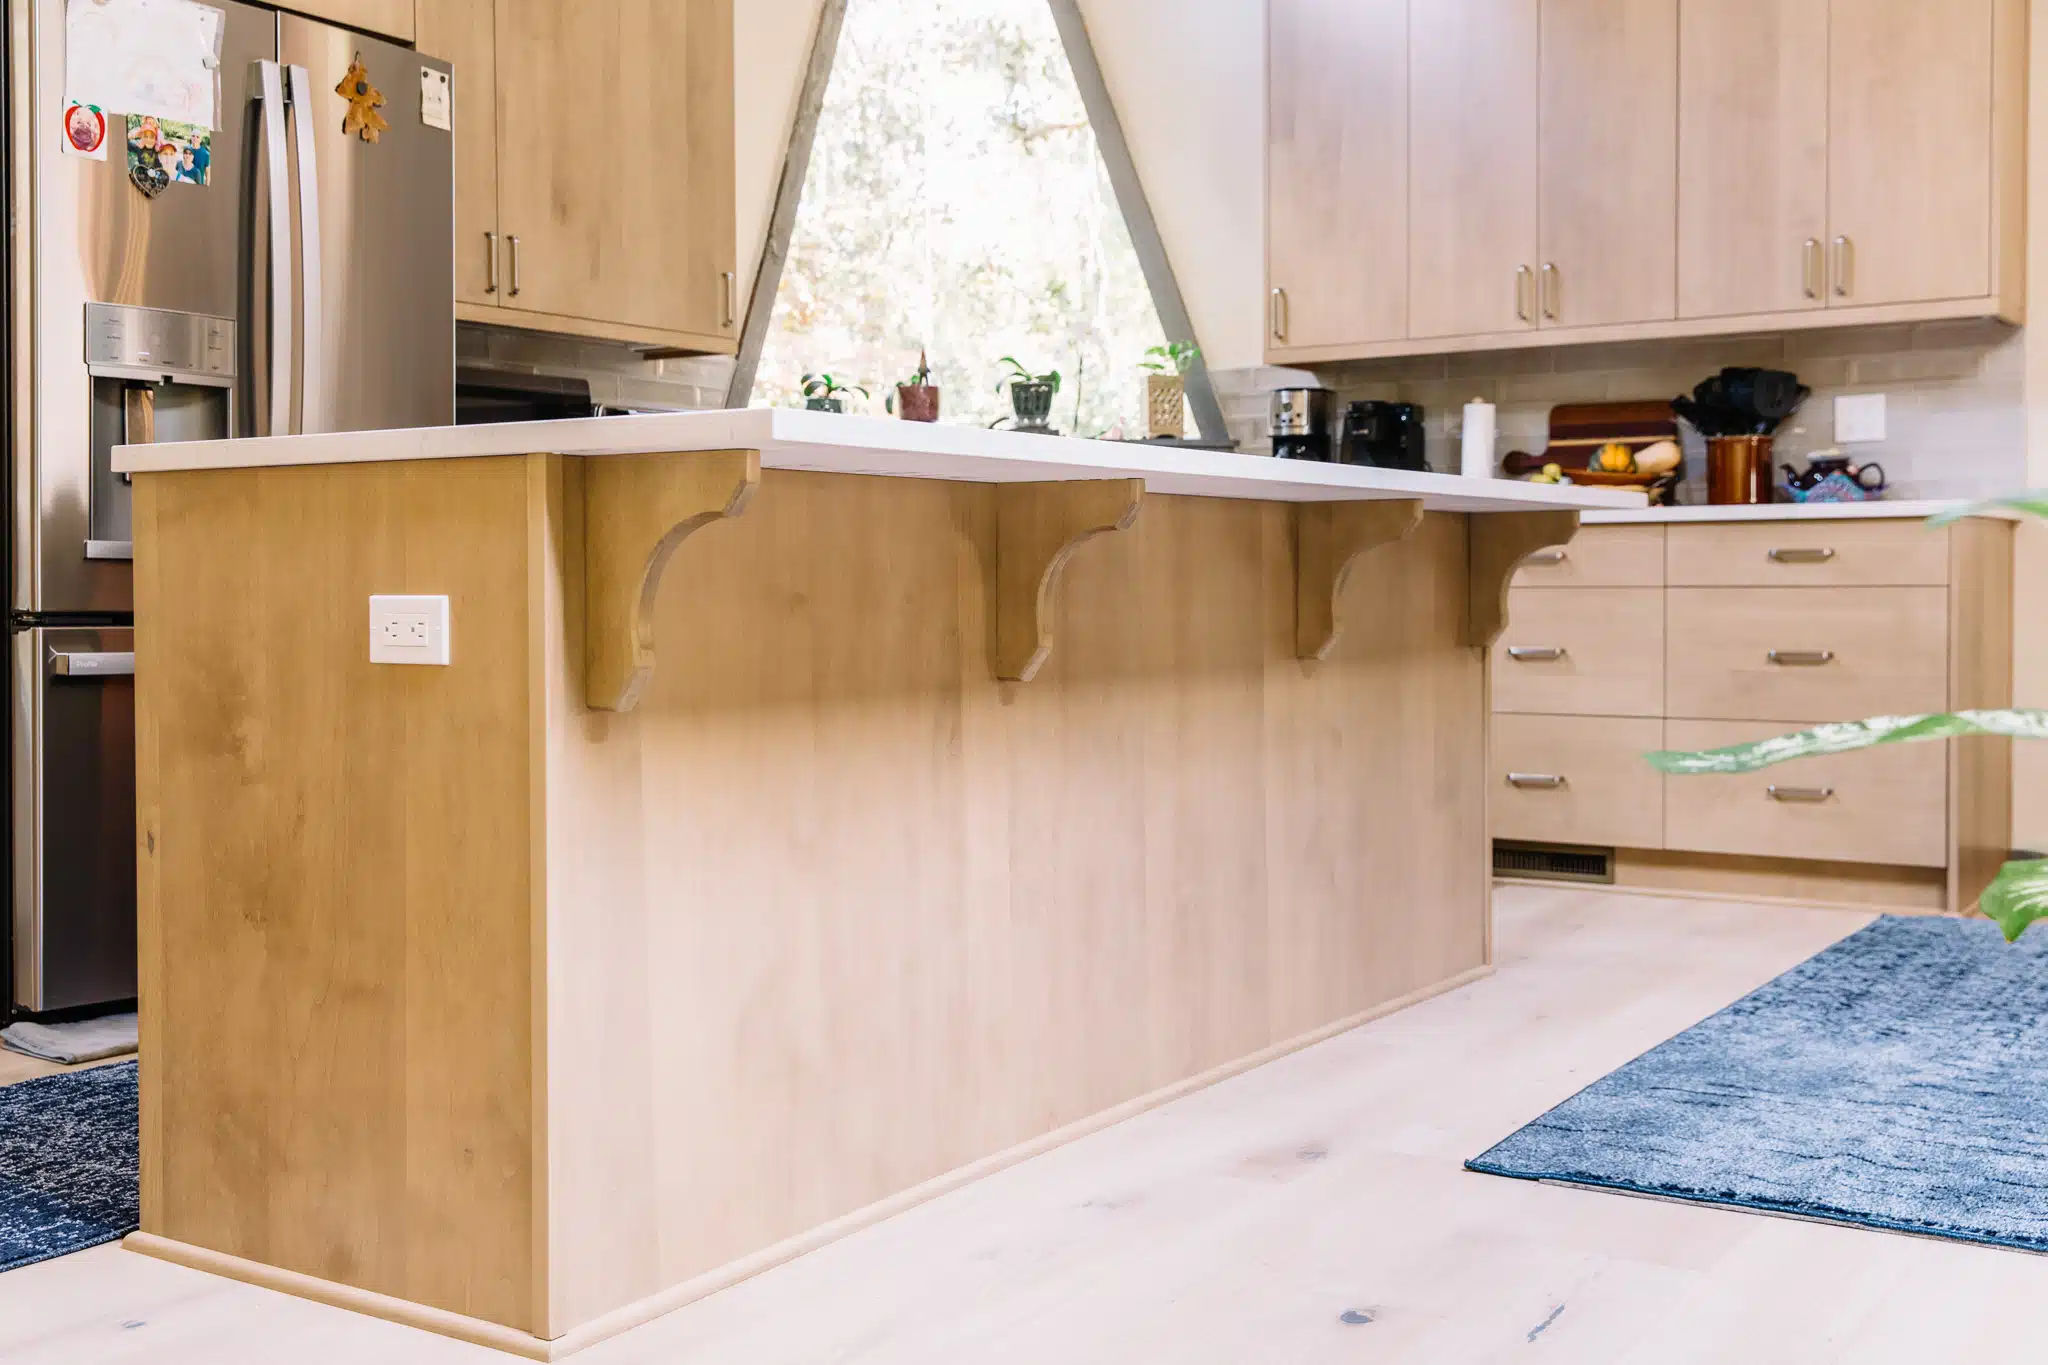
White Oak Flooring
As you can see, the dining room and kitchen areas used to have two completely different types of flooring. To create a more cohesive style after removing the kitchen wall, the homeowners chose to run white oak flooring throughout the area.

Before: The old flooring looked old and inconsistent throughout the home

After: The new flooring makes the space brighter and creates a consistent look throughout the home
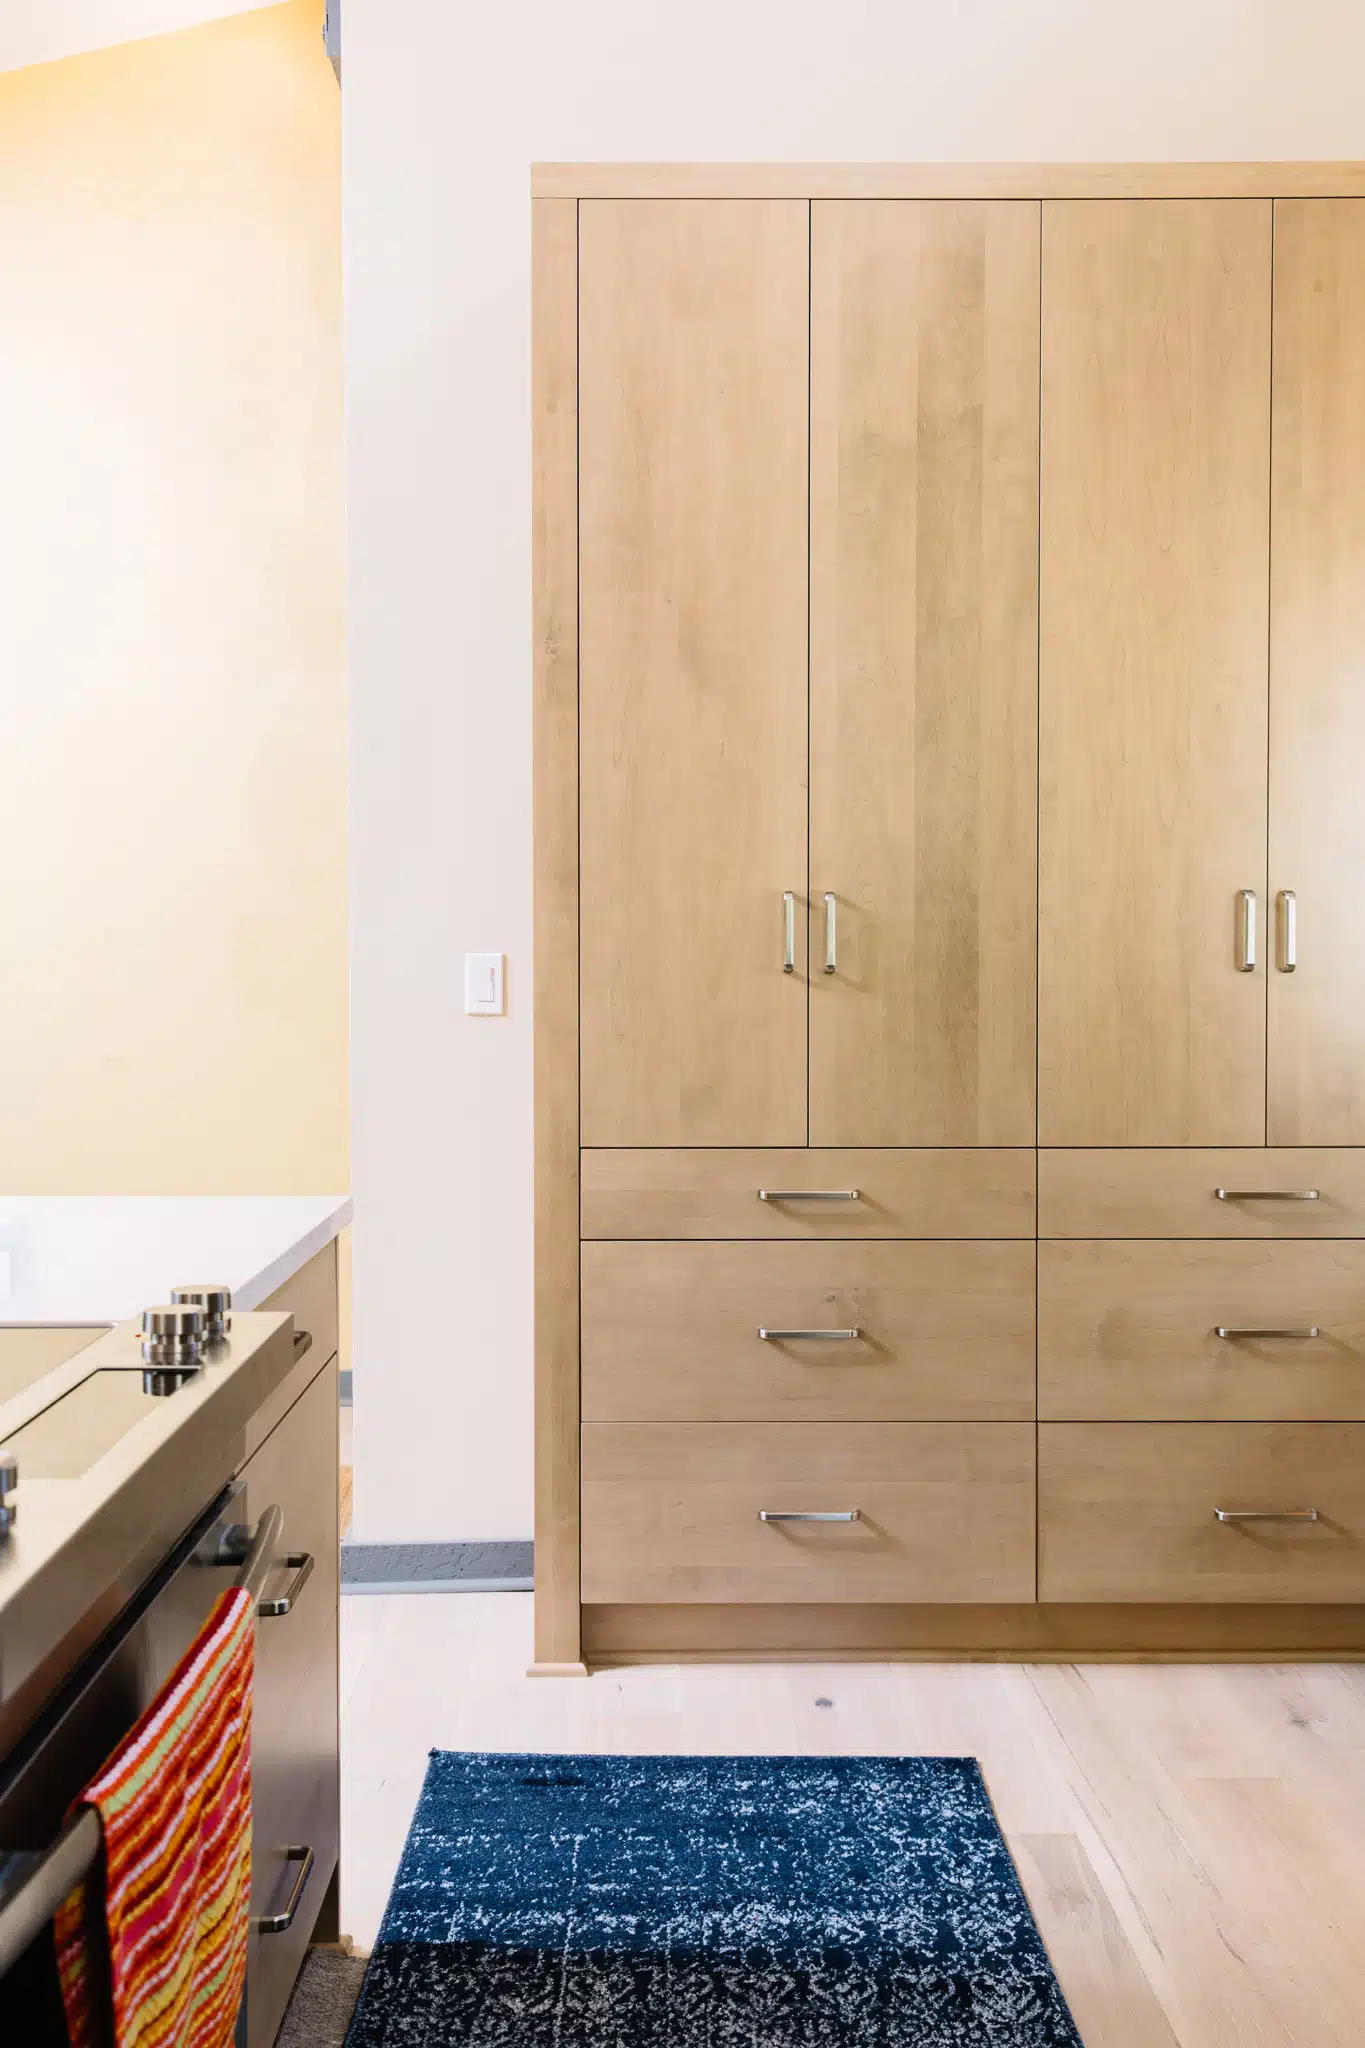
Freestanding Tall Cabinet
The homeowners had a hutch with a glass front that used to stand near the entrance of the kitchen. In order to maintain their storage, we installed a huge tall cabinet in its place to keep the kitchen’s look cohesive. The original hutch was moved into the dining room so the homeowners can still display their

Before: The hutch was used for storage

After: A Larger Tall Cabinet with drawers and rollouts
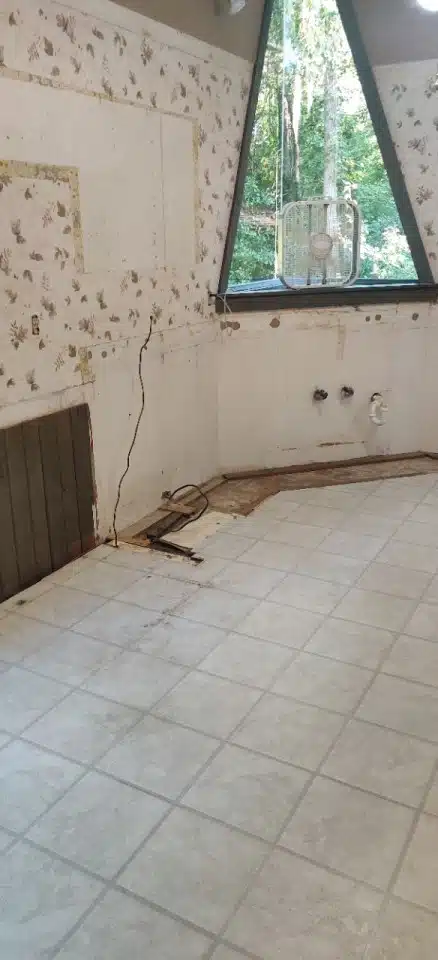
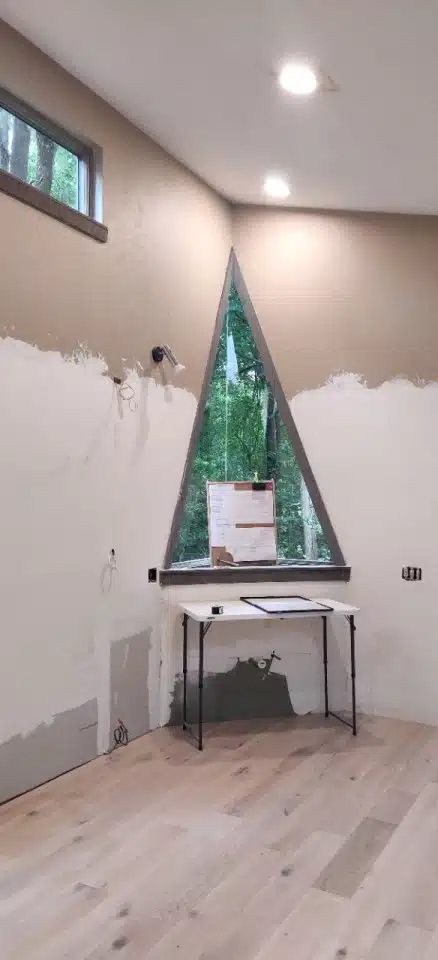
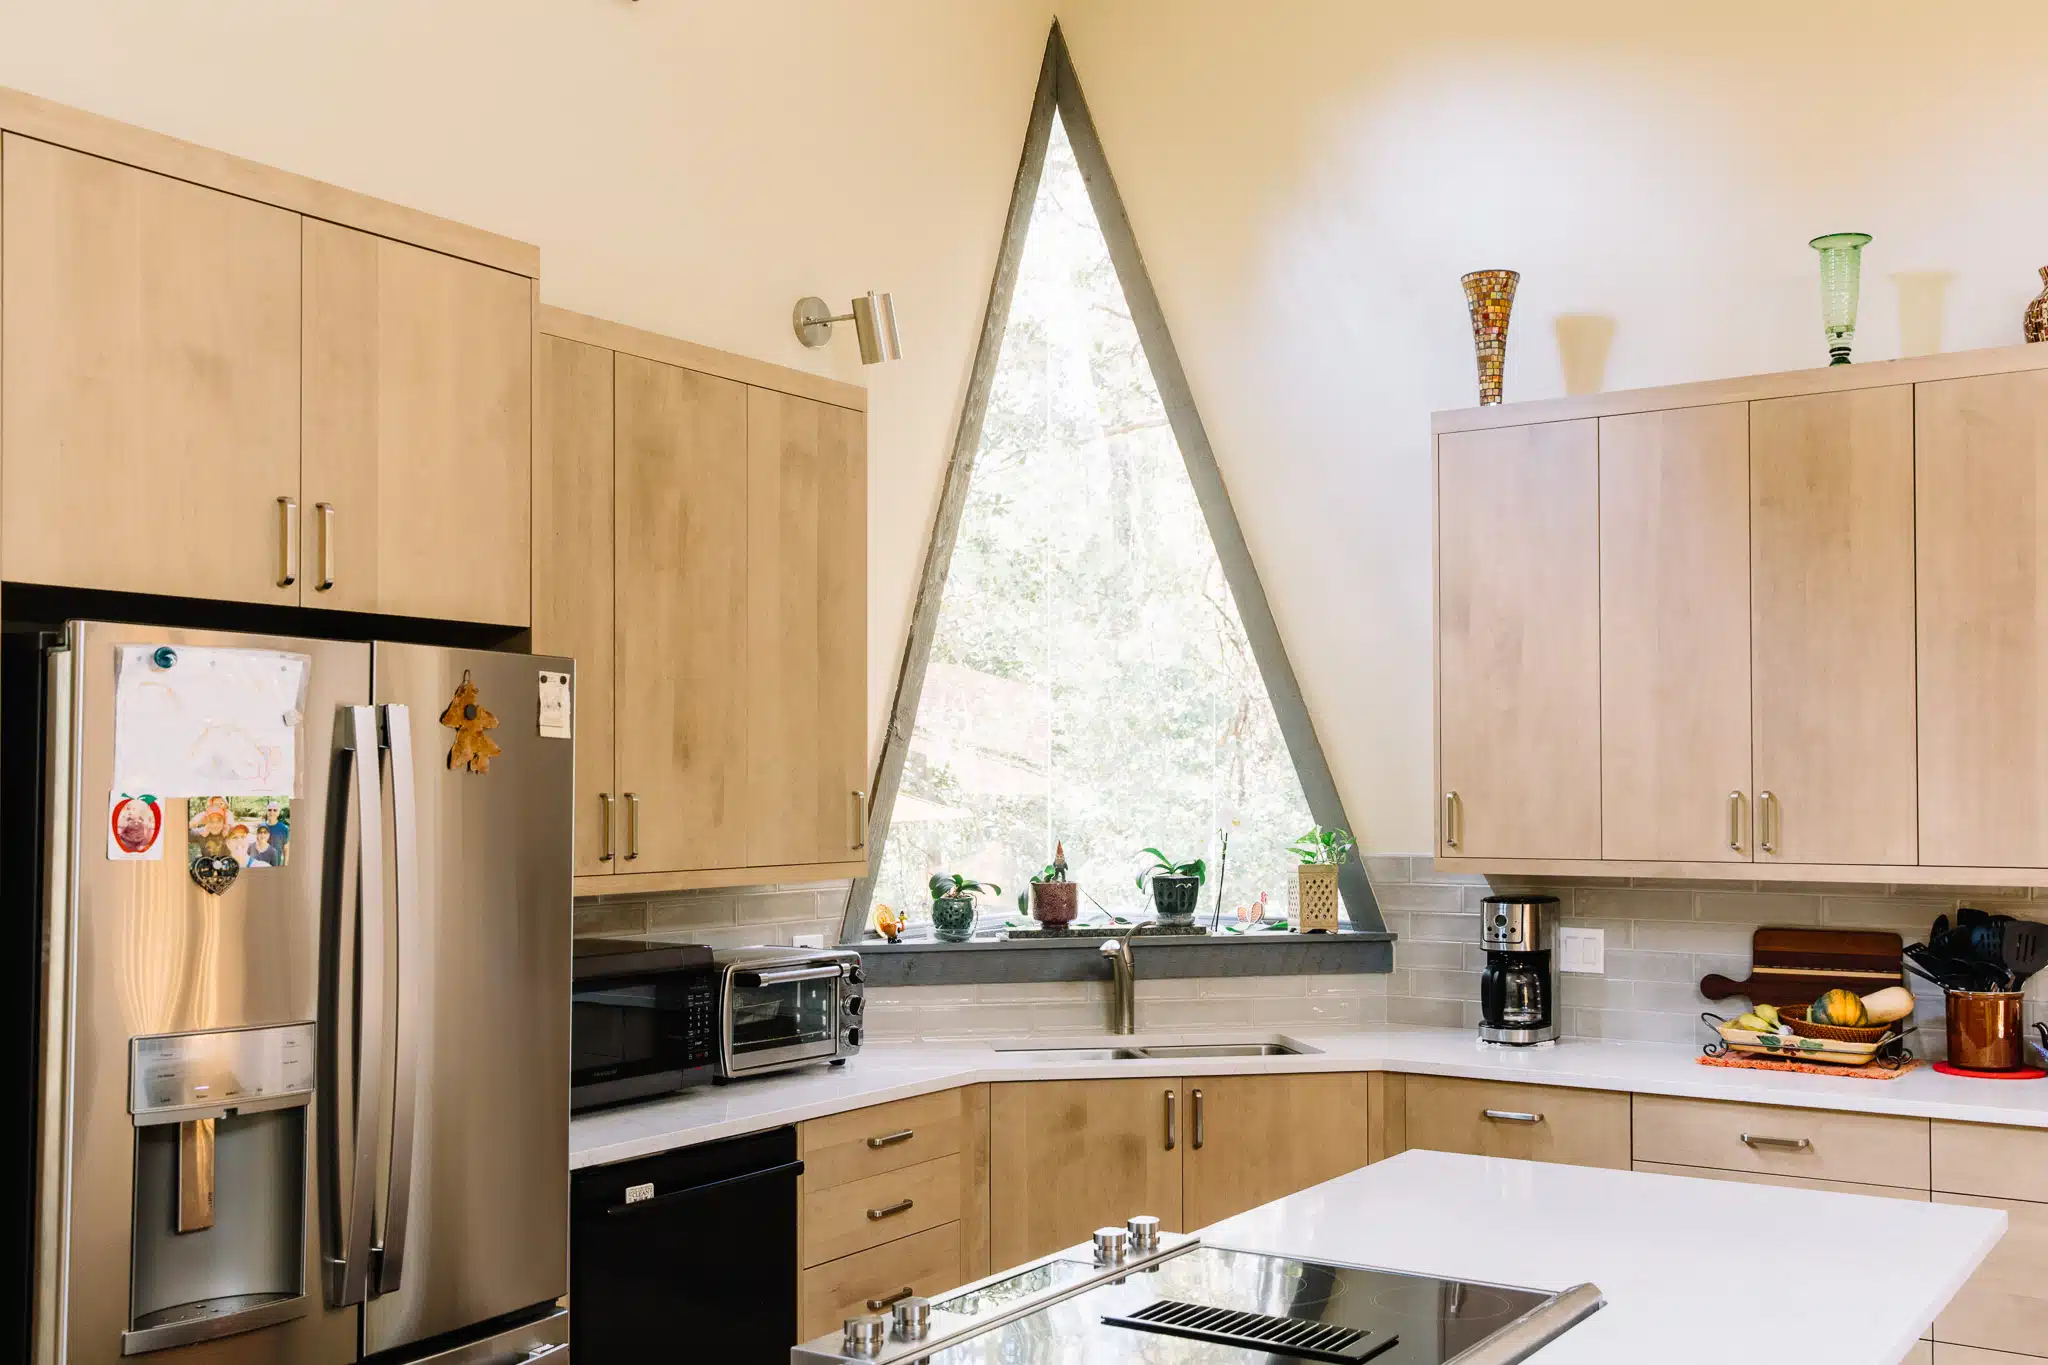
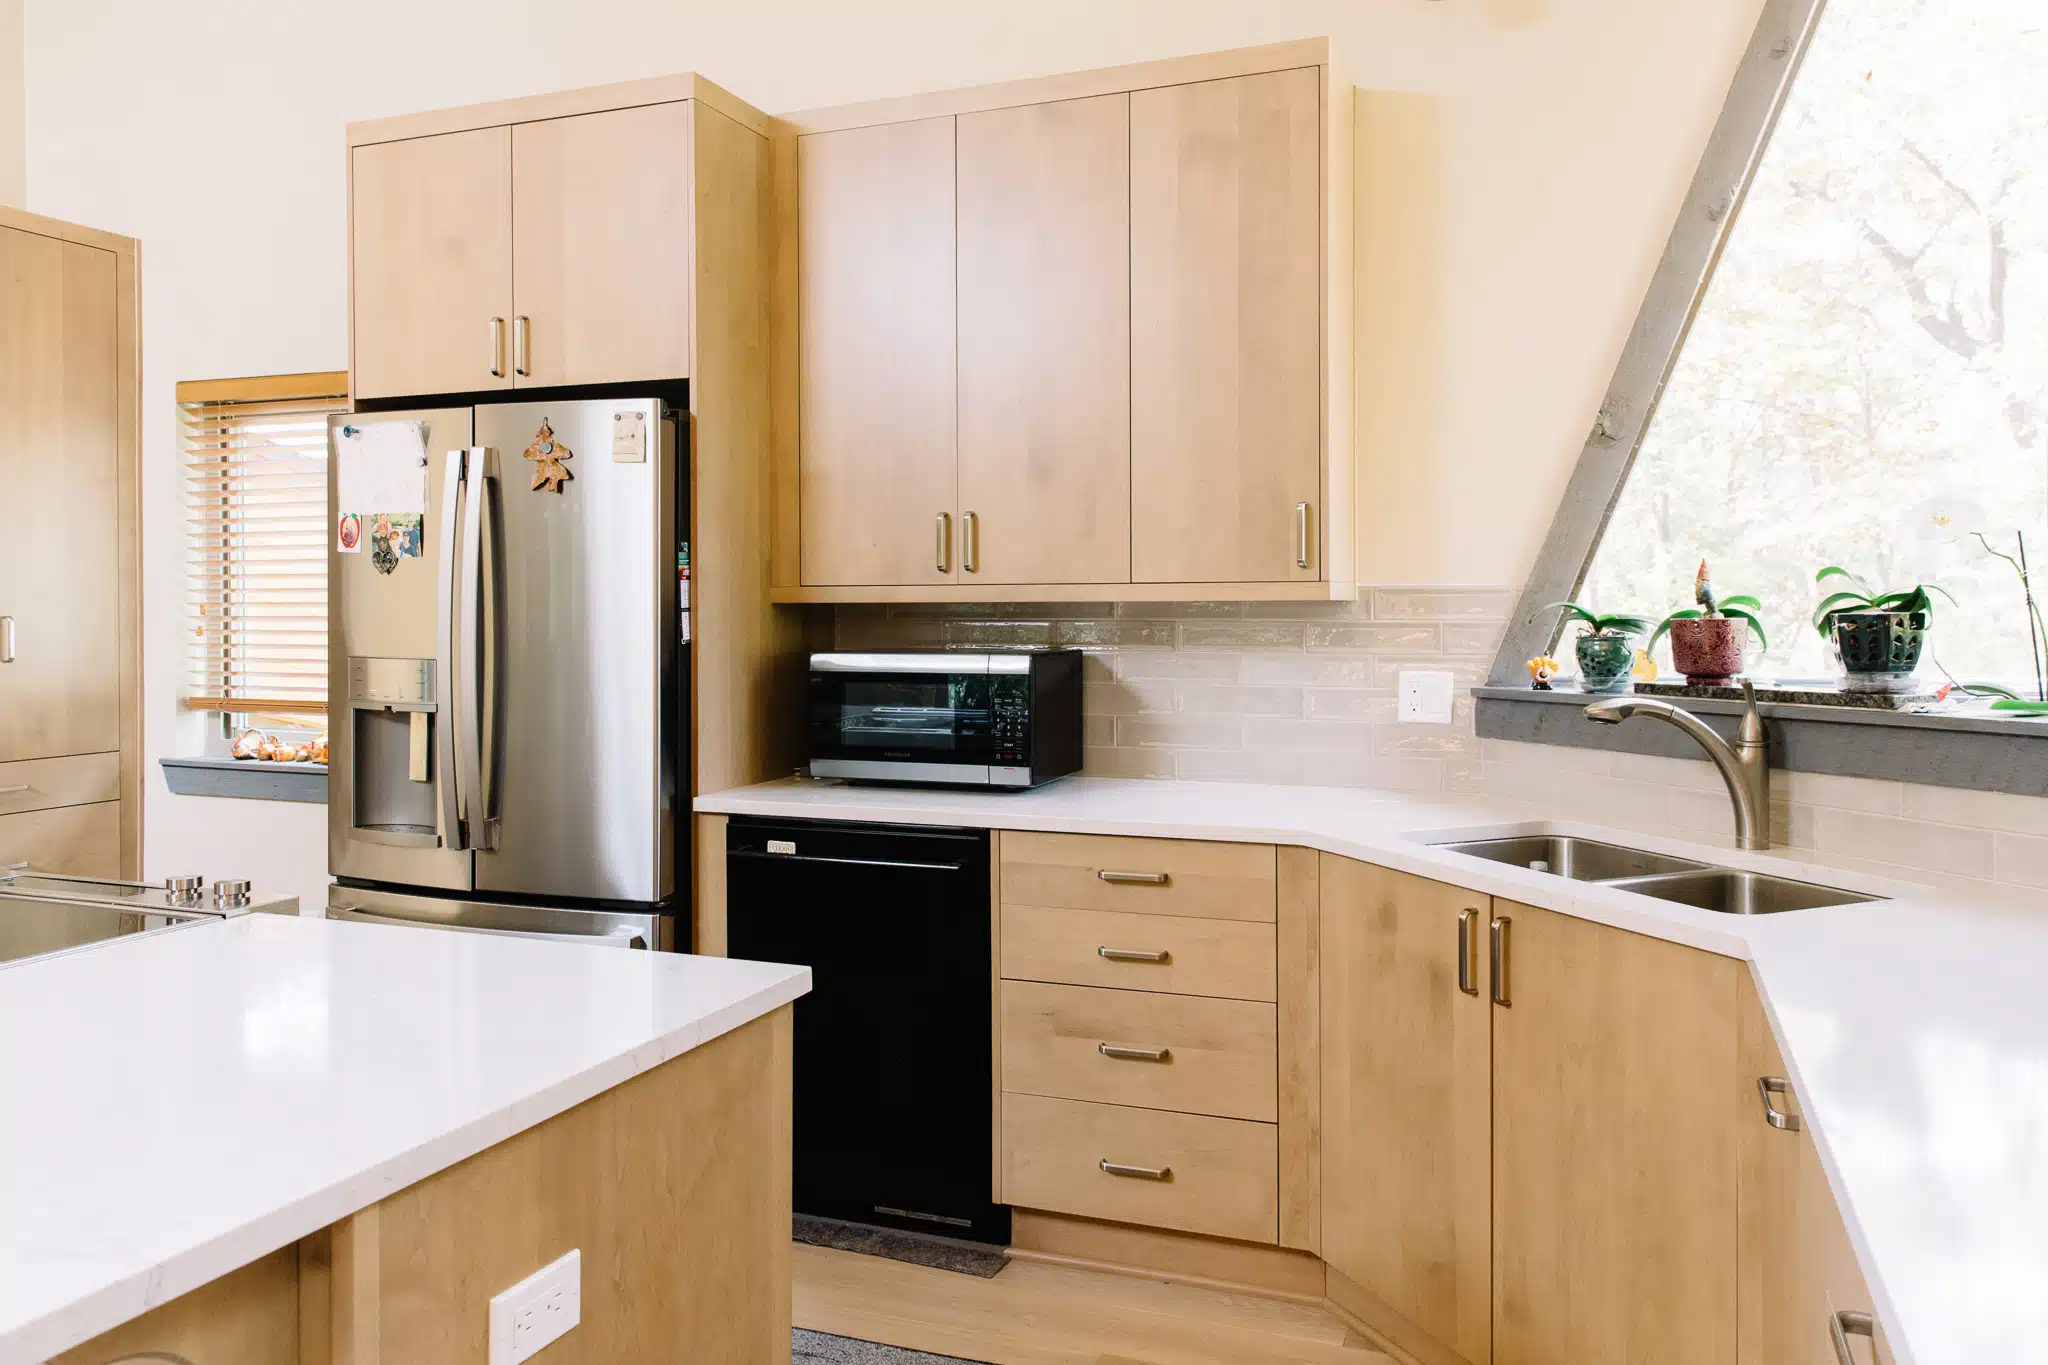
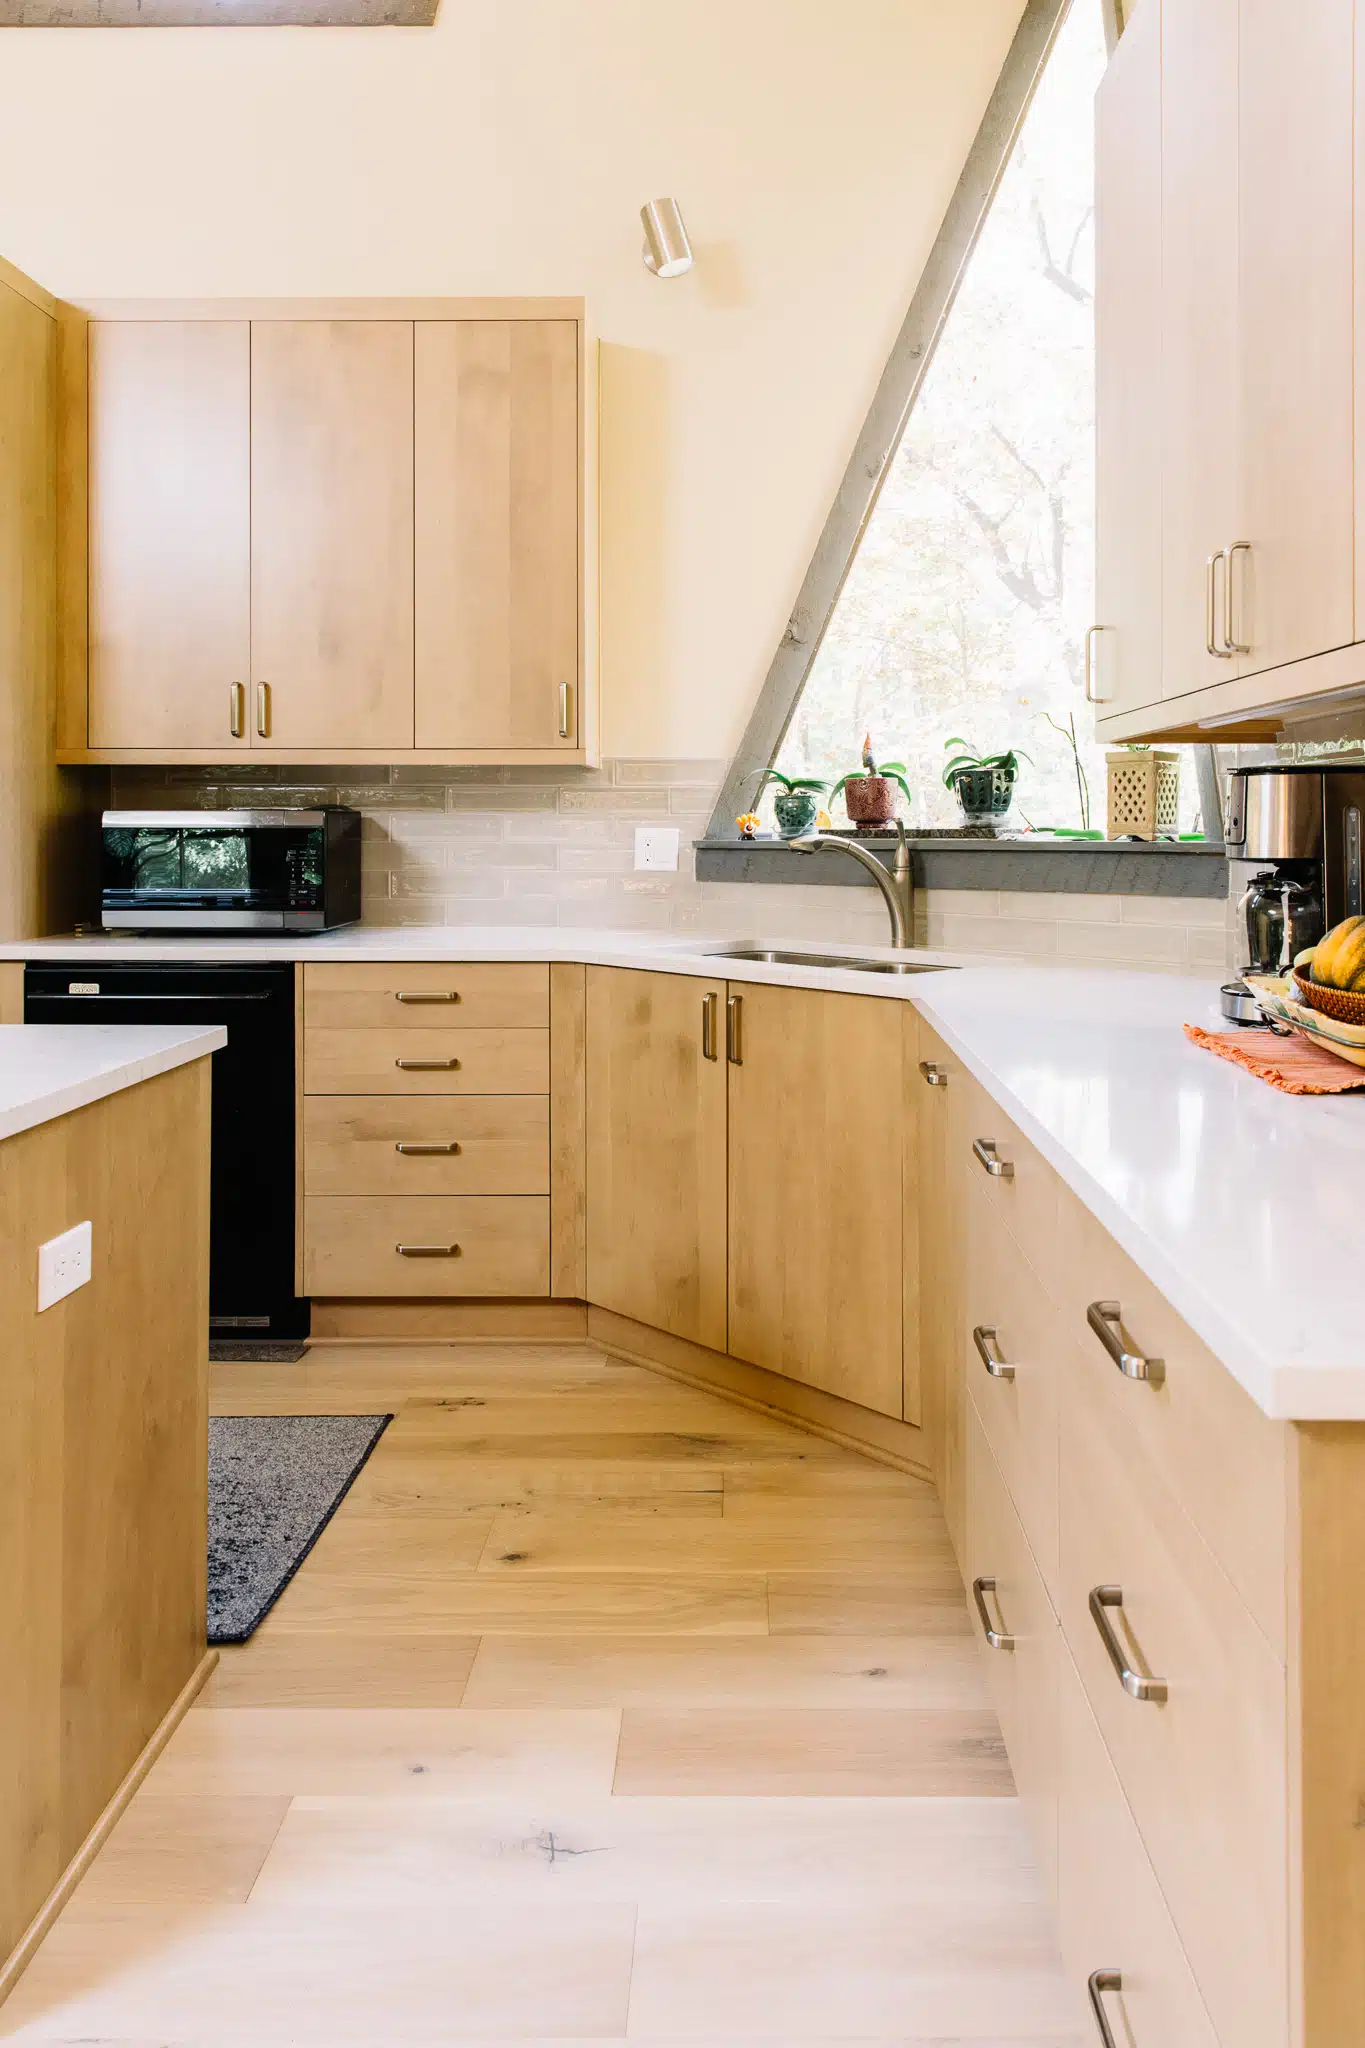
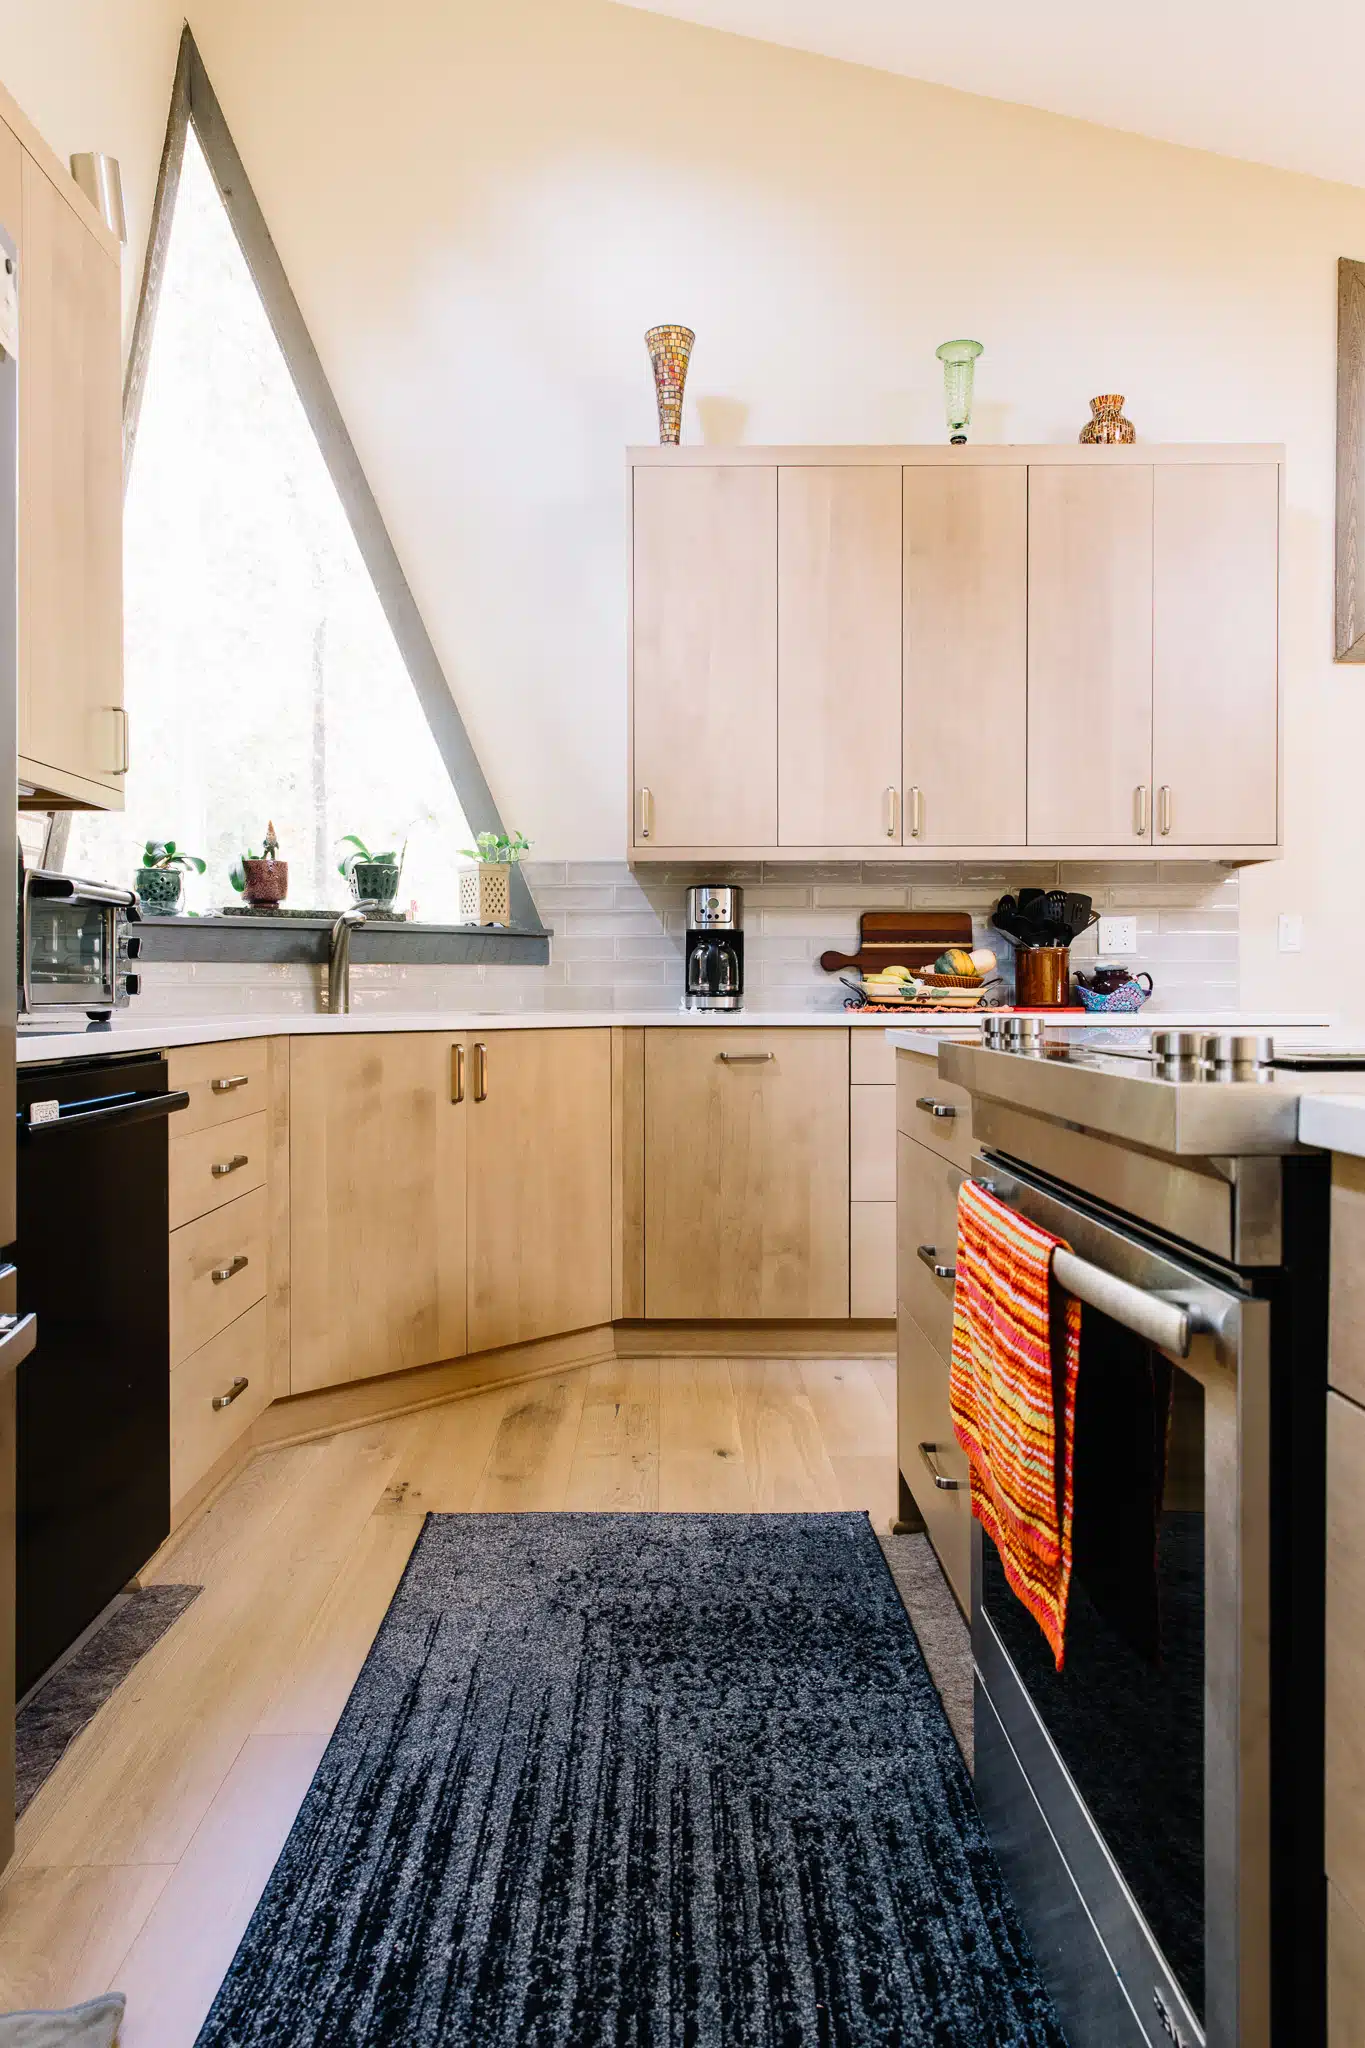
Triangular Window
The triangular window above the kitchen sink is possibly the most unique part of this home. A big priority during this remodel was to preserve and enhance the the natural beauty of the window.

Before: The window’s light was blocked by the wall enclosing the kitchen

After: The window can be seen from anywhere in the main area of the home
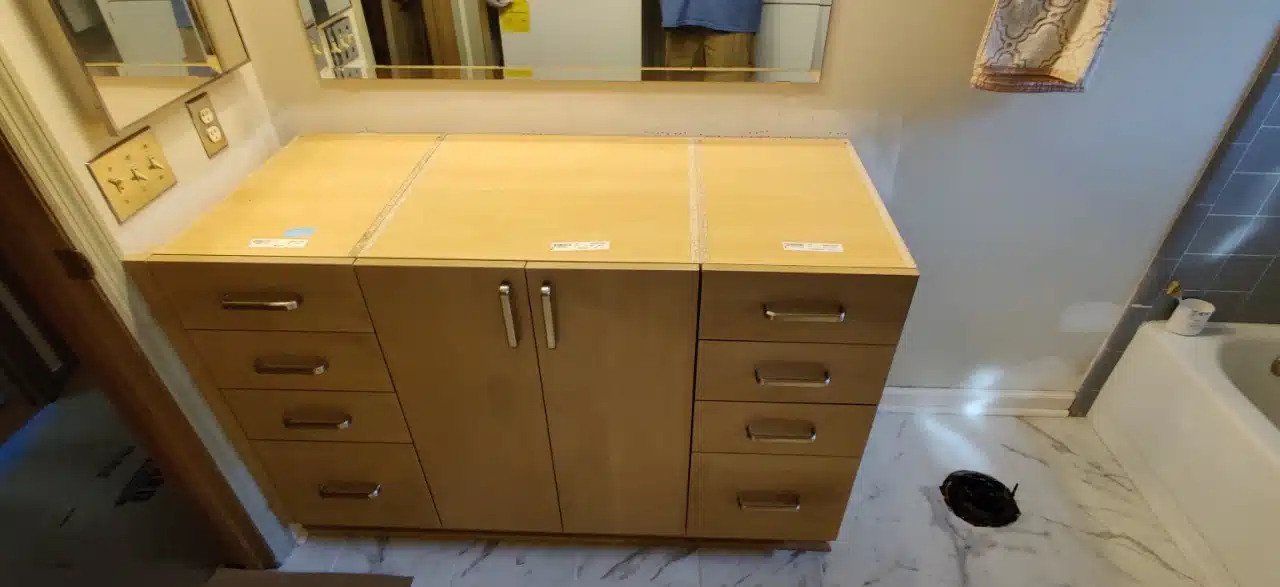
New Guest Bath Vanity
It is amazing how a new cabinet and flooring can make a space look unrecognizable to what it once was. We were thrilled with the choices these homeowners made when updating the style of this space.

Before: Older cabinets and granite countertops made this space look very dated

After: New cabinetry, flooring, and quartz countertops completely transformed this space
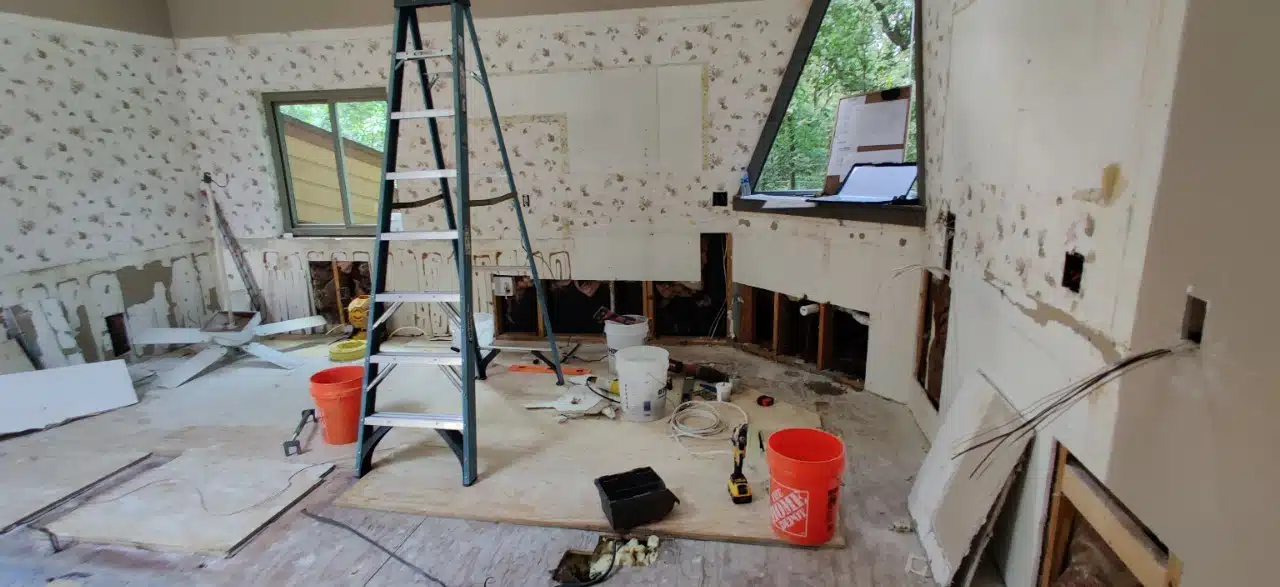
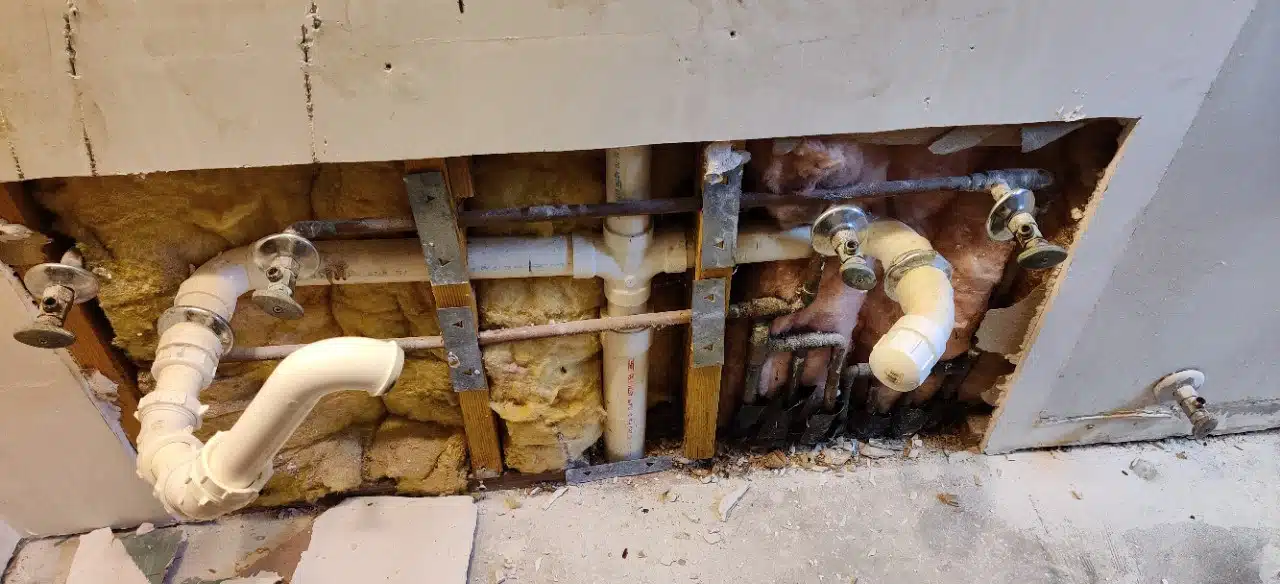
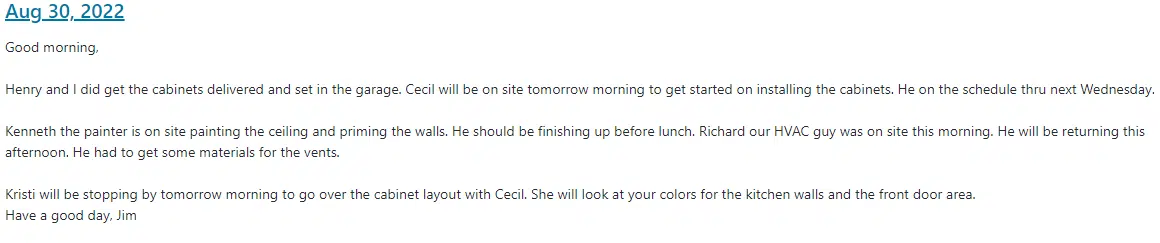
Project Story – Daily Logs and Pictures From The Project
Scroll through the gallery below to read the story of this project as told thru the messages, picutres and daily logs we recorded from design, through construction.
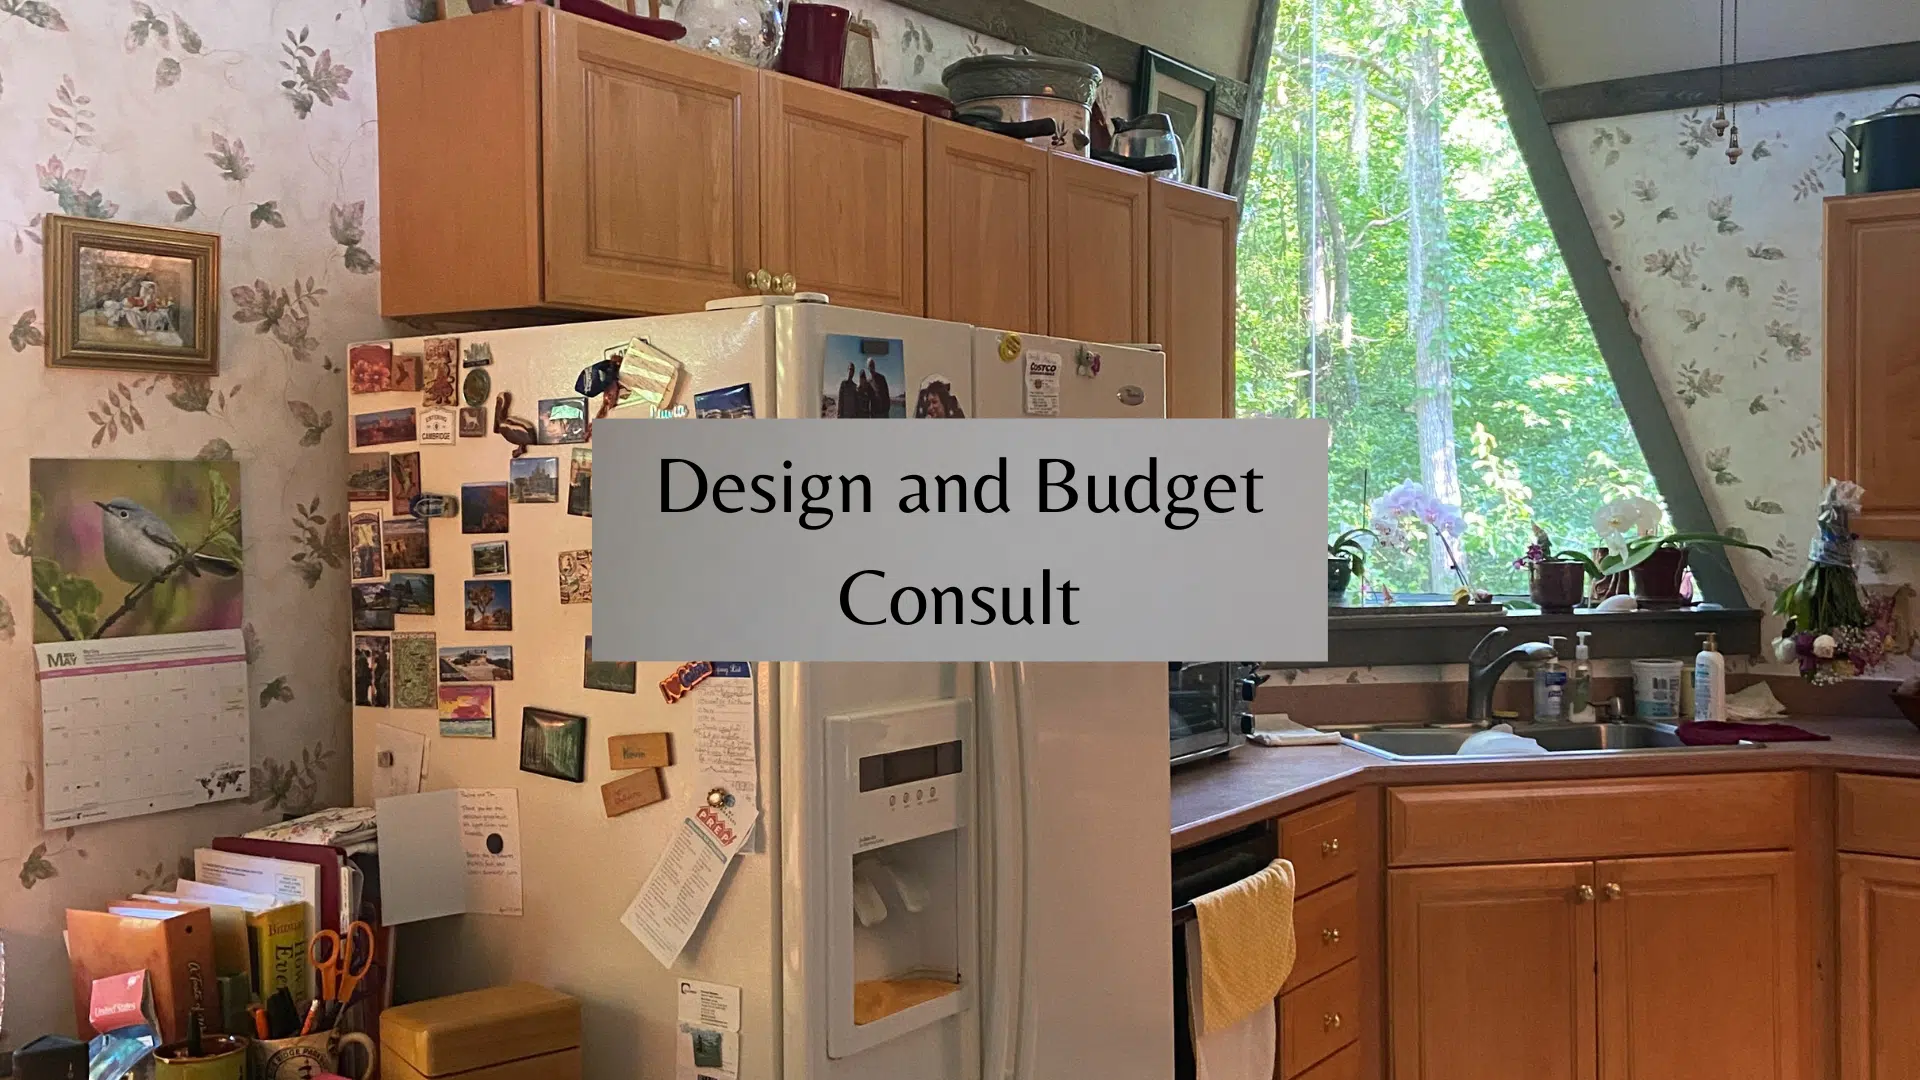


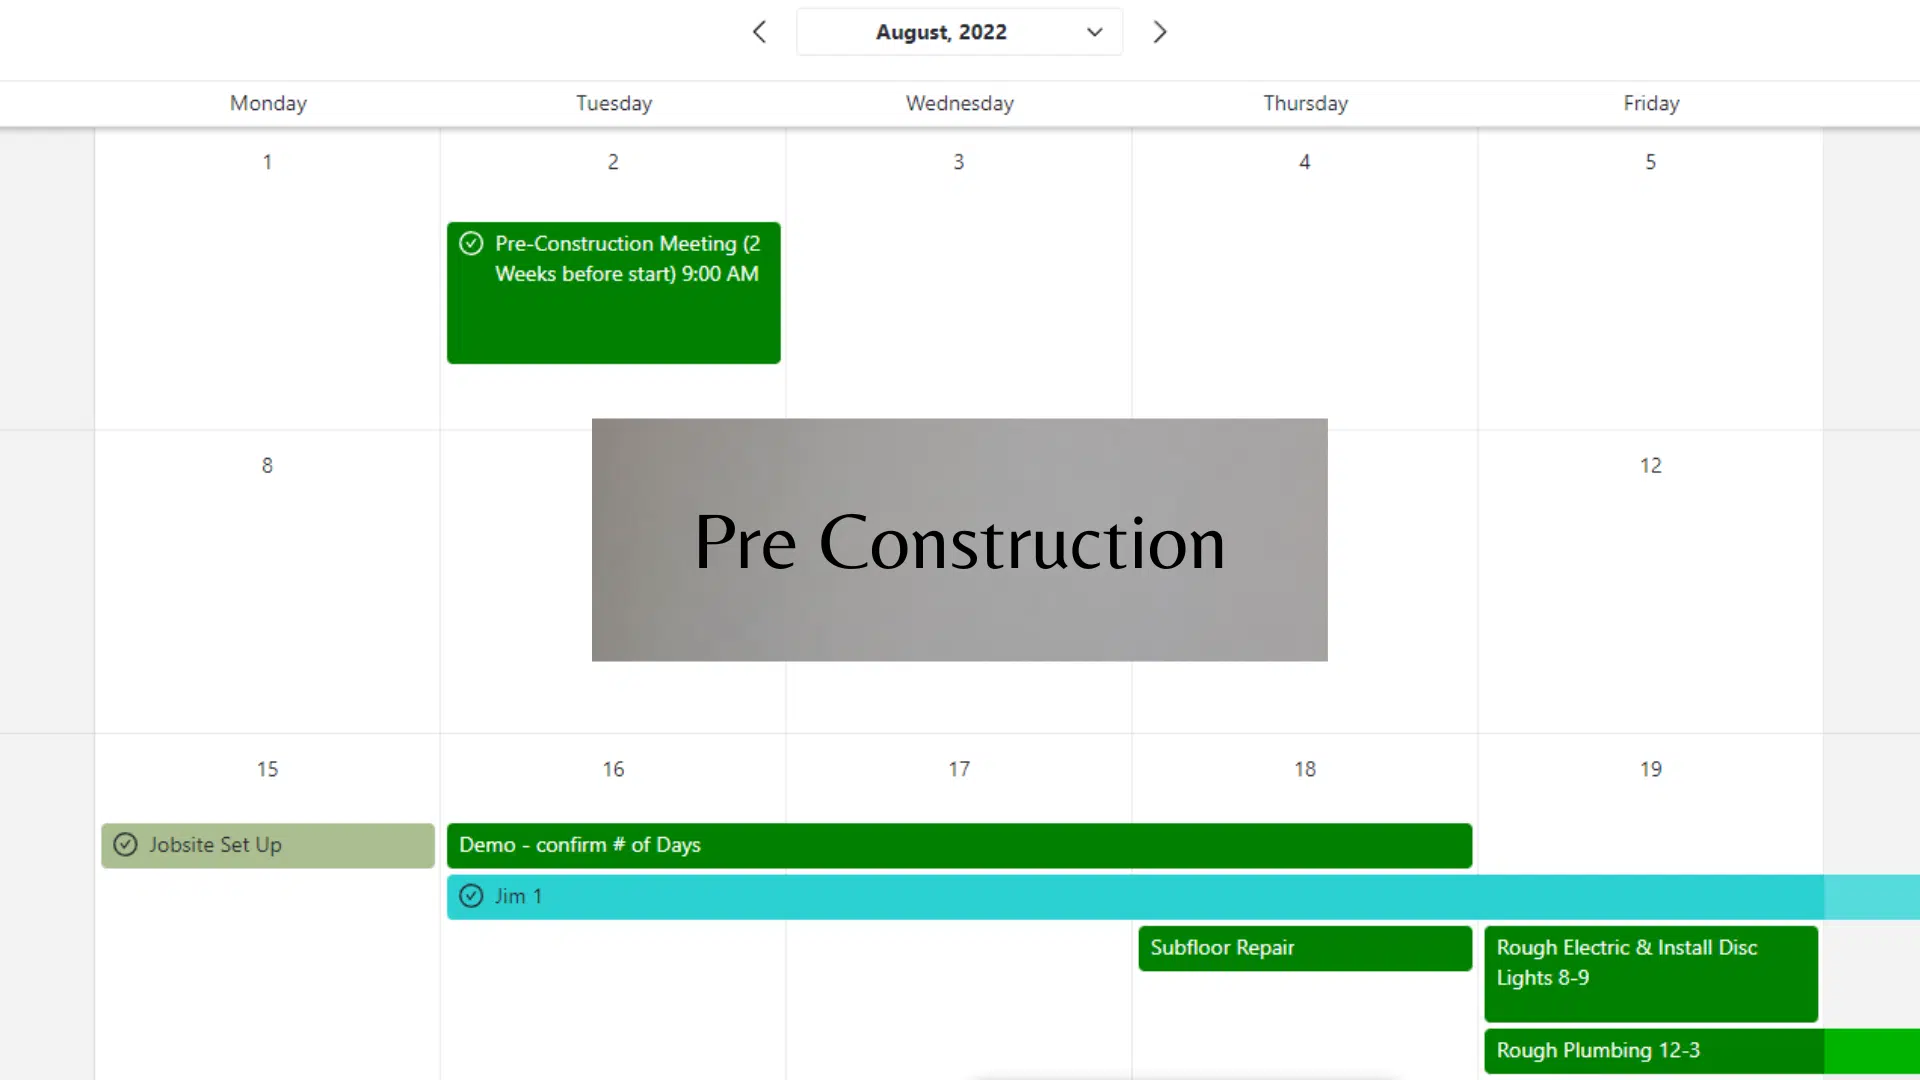


Click the image above to scroll thru the ‘story’ of this project.
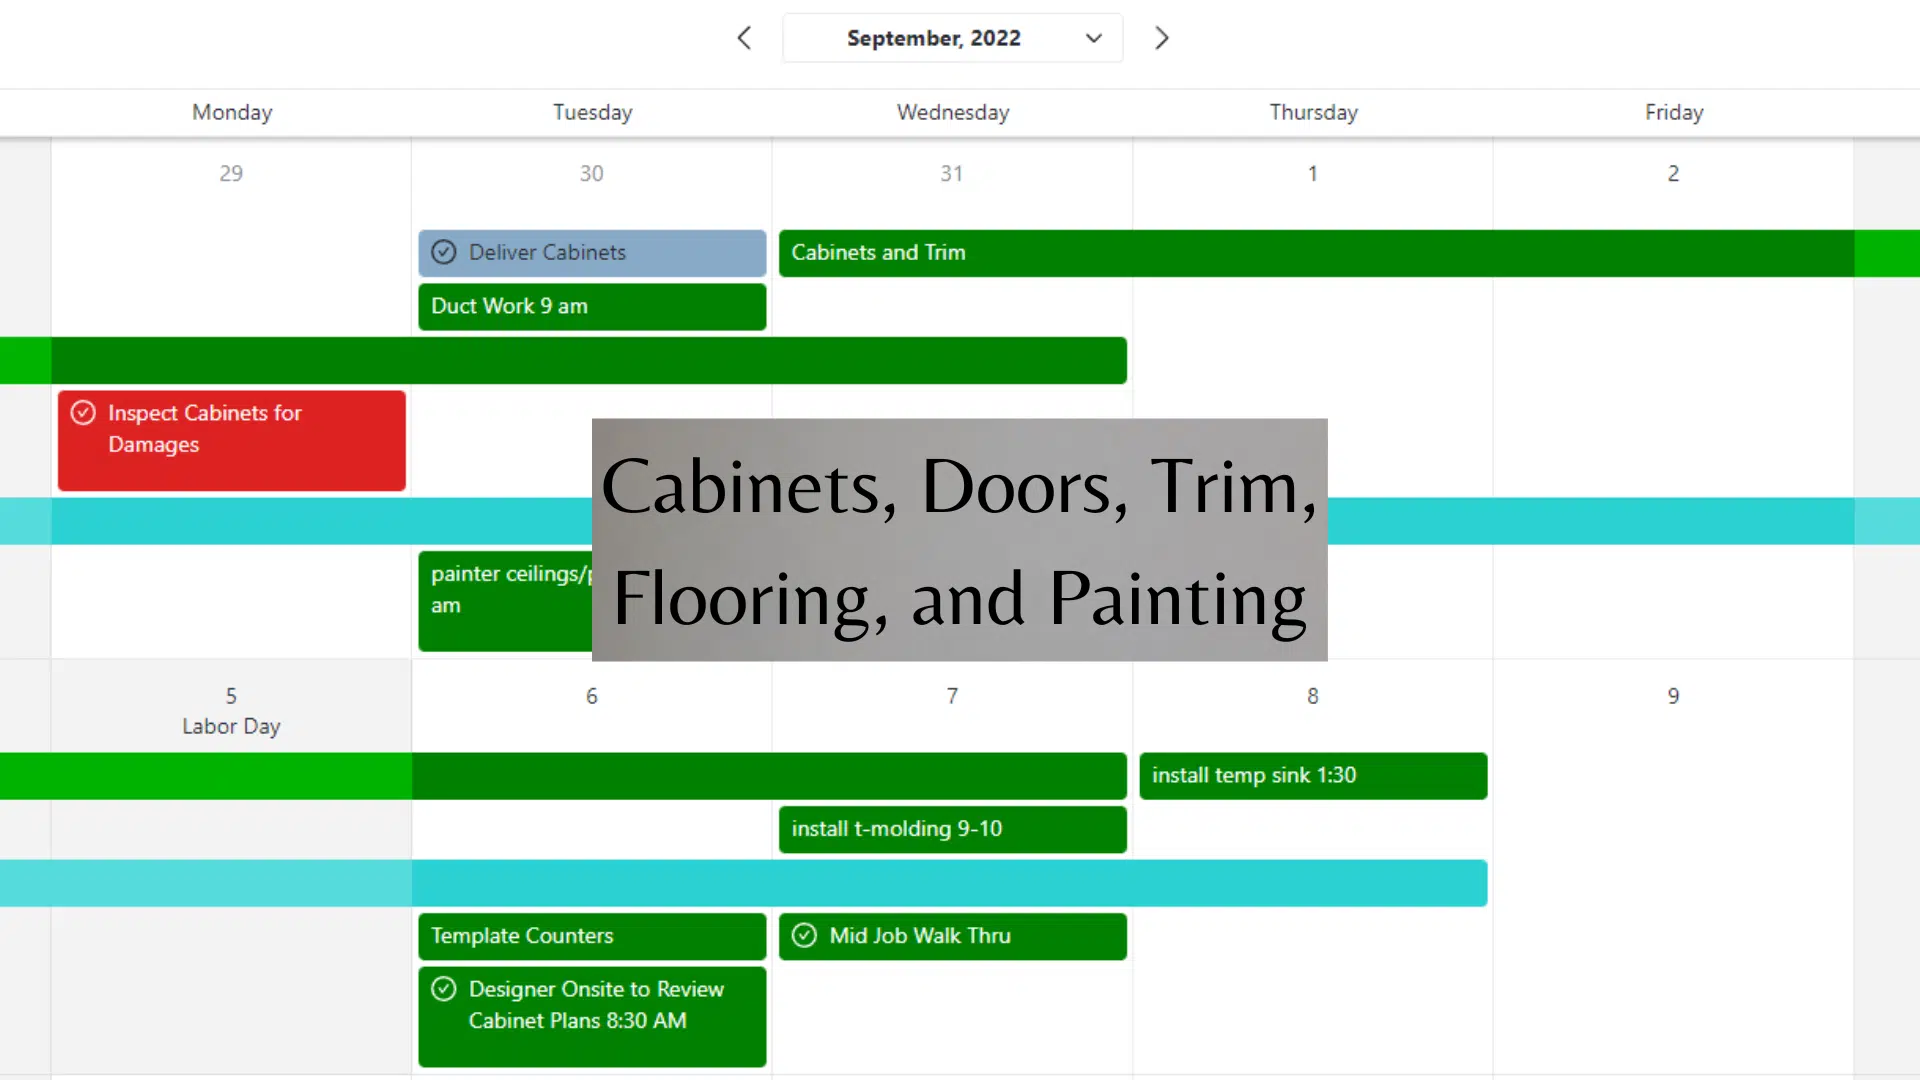
Timeline, Challenges and Solutions
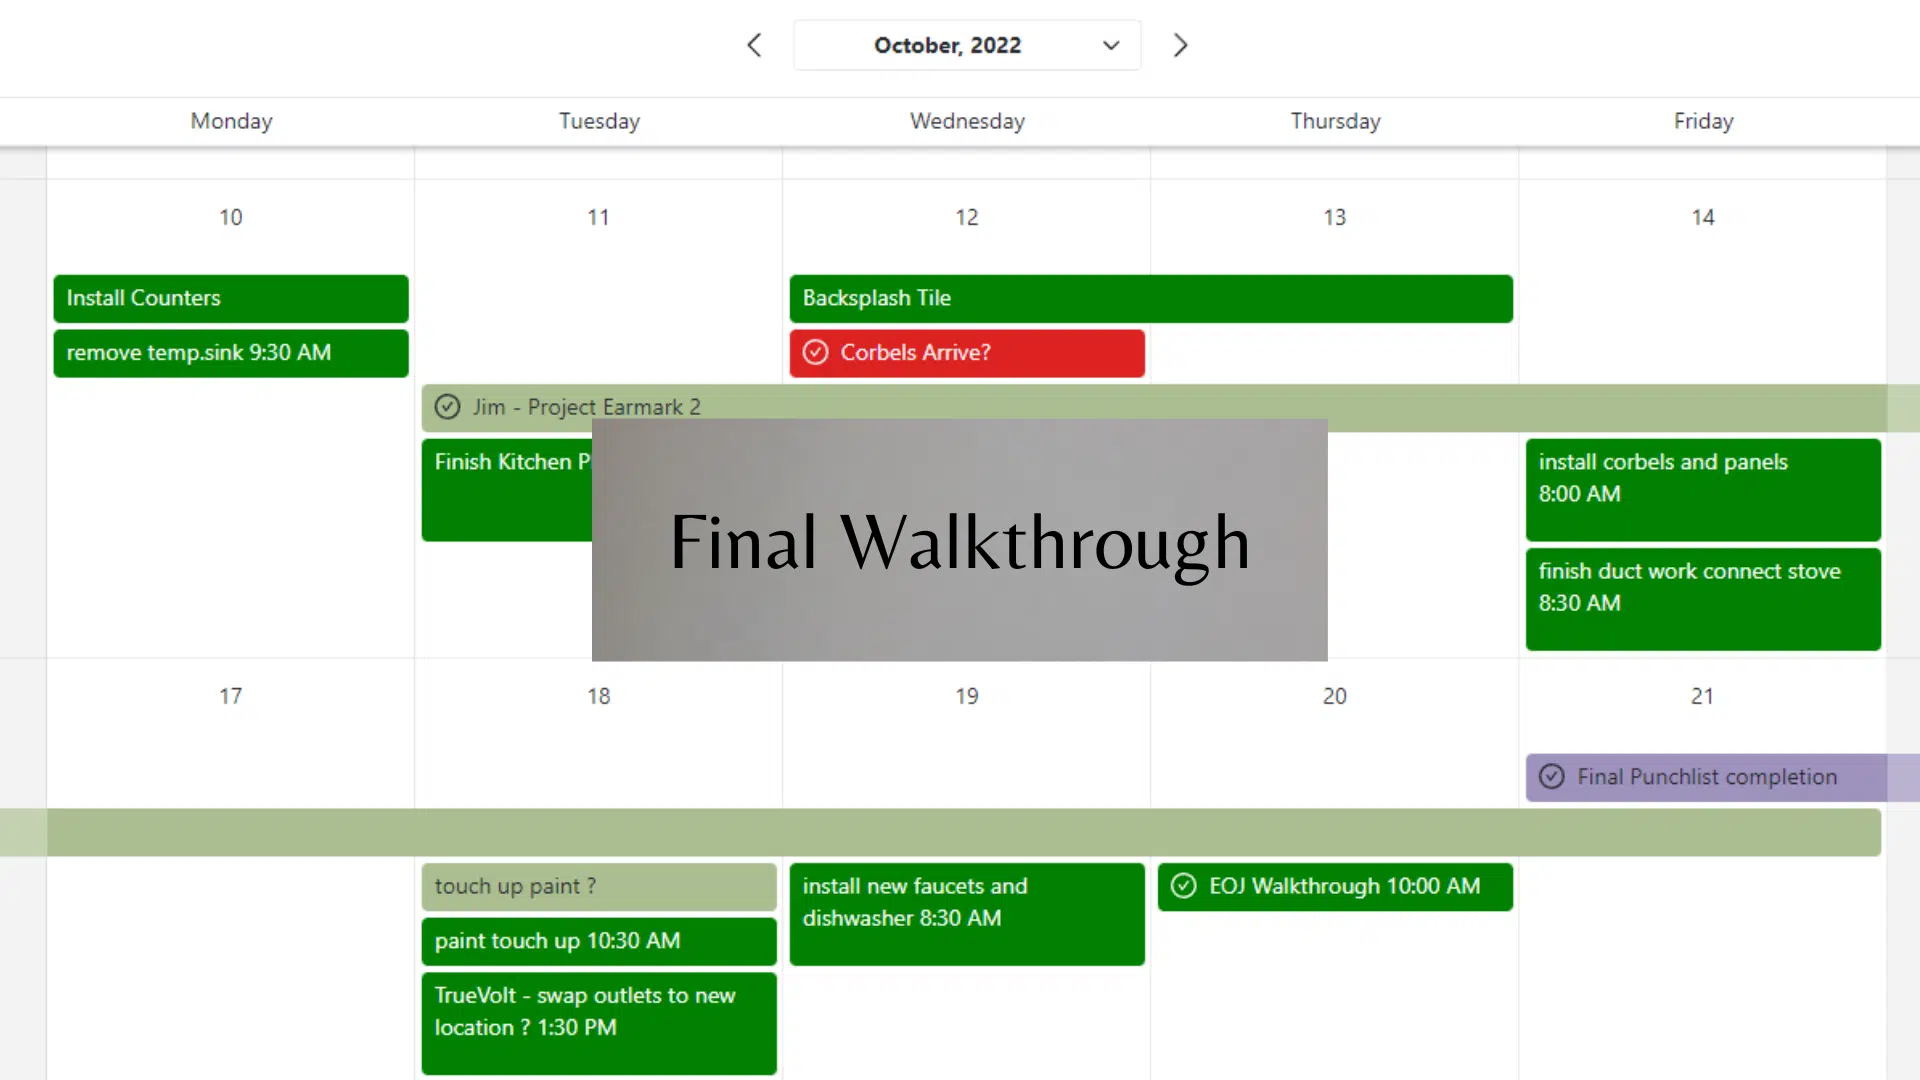
Project Start
August 15th, 2022
Estimated Completion
December 23rd, 2022
Actual Completion
October 27th, 2022
Originally we were supposed to start this project in October and finish in December. But out cabients company had some extra capacity on the prodcution line and we were able to jump the queue and get their cabinets much sooner!
In the end, the project ran about two weeks over the original schedule.
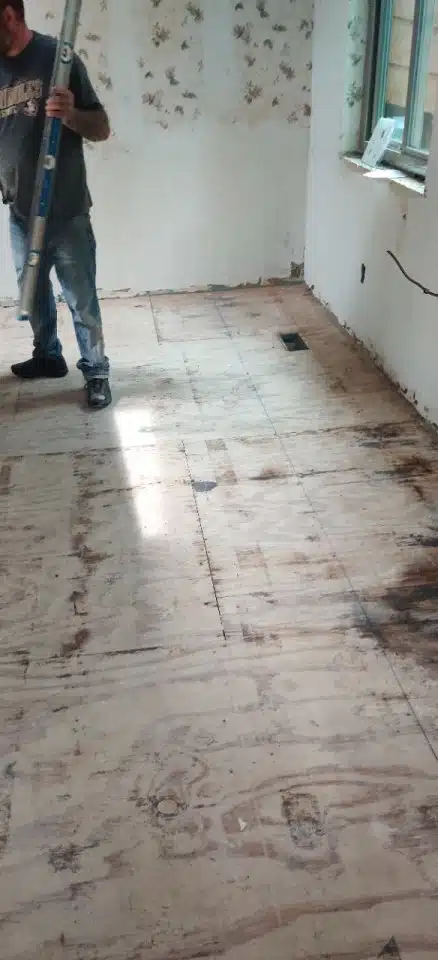
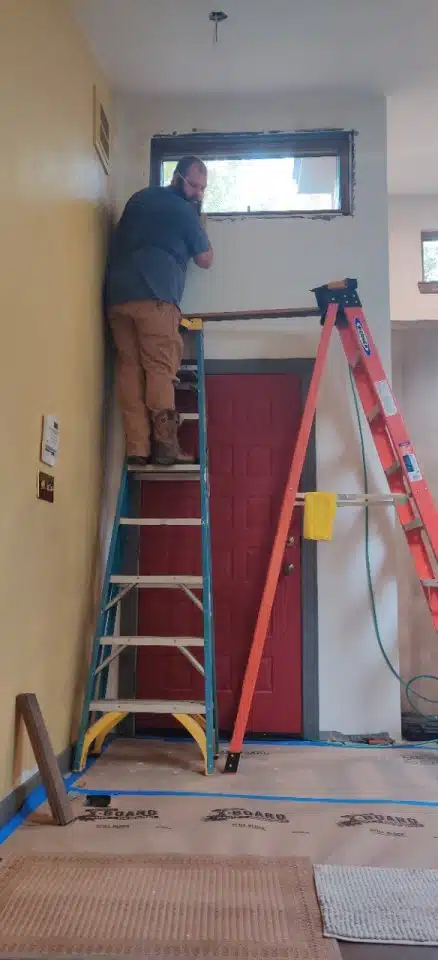
This project ran smoothly but did have a few minor issues. The biggest was the subflooring. When we remoded the wood floors we discovered that their subflooring was only 1/2 inch this, not 3/4 inch which is standard. After some discussion we agreed to write a change order and replace all of the subflooring.
When the appliance delivery company damaged a cabinet when bringing the fridge in. We ordered a replacement (and Mays Munroe took responsibilty and paid for it) but it took several weeks to get it.
The other issue we ran into was due to an error in the description of therr faucet from the manufacturer. We though the faucet had a ‘pop up drain’ because that is what the specs said. But when we went to install the faucet we discovered it had a drain that required a pull up lever at the back. This created an issue because the lever would hit the quartz backsplash. We worked with the client to chosoe a new fixture and we covered the cost.
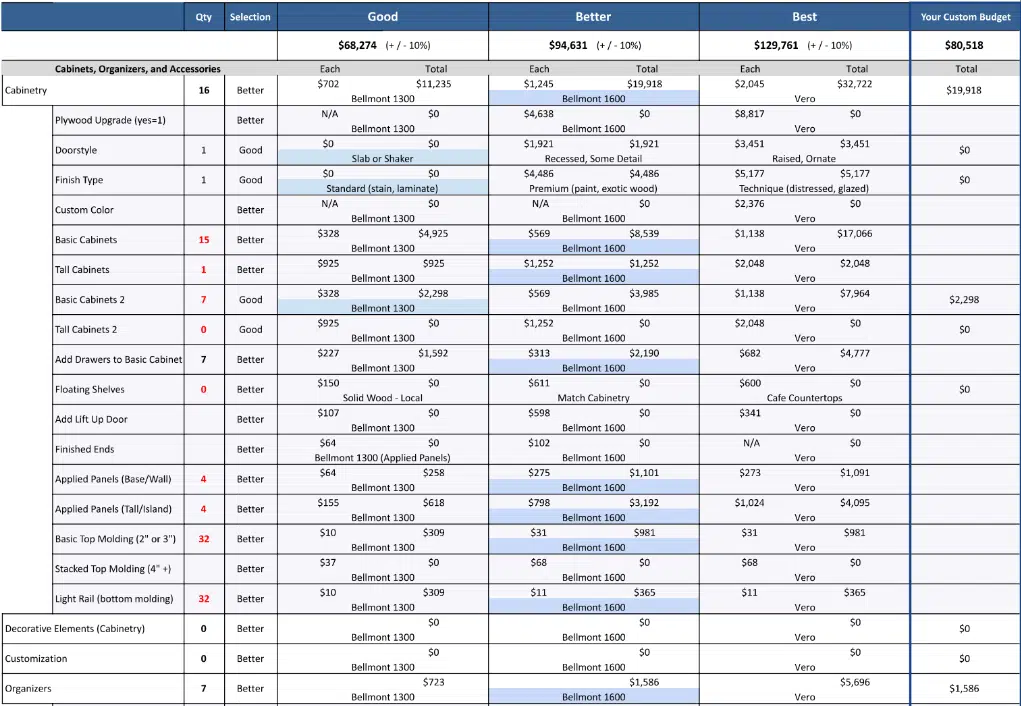
Creating an Open Kitchen Project Costs
Initial Budget: $80,518.00
Fixed Price Proposal: $102,199.49
Change Orders: $9678.12
Final Project Cost: $111,877.61
Cost Details
The initial Good-Better-Best budget for this project was $80,518.00 while the final total was $111,877.61
Budgets will often increase durning the design phase of a remodel as homeowners splurge for the look that they are dreaming of. This project was no exception, as the cost of this remodel went up by about $20,000 before the final contract was signed.
During the project, there were four big change orders that ramped up the cost of the project. One was due to ‘hidden condition’ … the subfloor issue described above. The others were additions to the scope of work requested by the client such as redoing entryway and painting the kitchen and dining room.
Cost Breakdown
- Installation Labor 30%
- Fixtures and Materials 41%
- Design and Project Management 13%
- Overhead and Profit 13%
- Shipping and Sales Tax 3%
Selections for Creating an Open Kitchen
Cabinets
The cabinets in this homeowner’s kitchen and baths are Decor Cabinetry’s slab doorstyle made of clear alder in a Uptown finish.
The cabinet hardware is Top Knobs’ Telfair Pull in a brushed nickel finish.
Counters
The countertops in the kitchen are Silestone’s Eternal Pearl Jasmine.
In the guest bath, the countertops are Silestone’s Eternal Serena.
Finally, in the master bath the countertops are Silestone’s Nolita.
Tile
The tile used for the backsplash in the kitchen is Emser’s Raku tile.
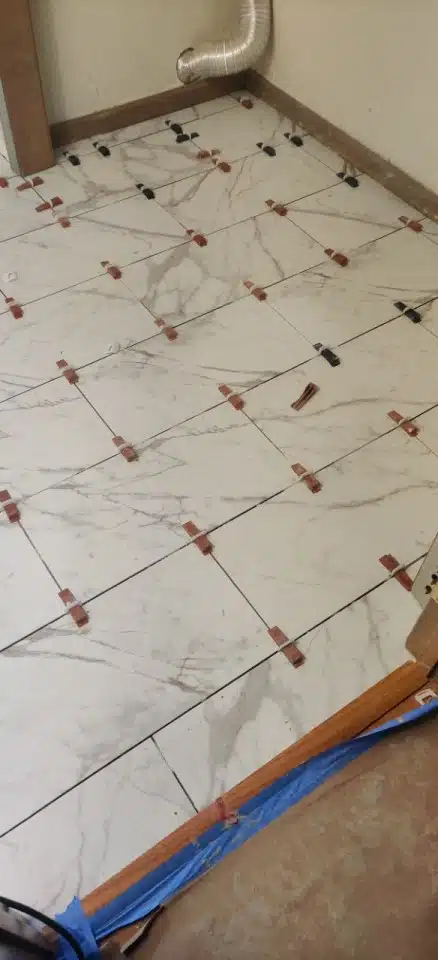
The tile floor in the guest bath is Daltile’s Costar Calacatta Empire.
Flooring
The flooring laid down throughout the house is Tesoro Woods’ Coastal Lowlands White Oak Bungalow.
Lighting
The under cabinet lighting was done using light bars from Task Lighting.
Appliances
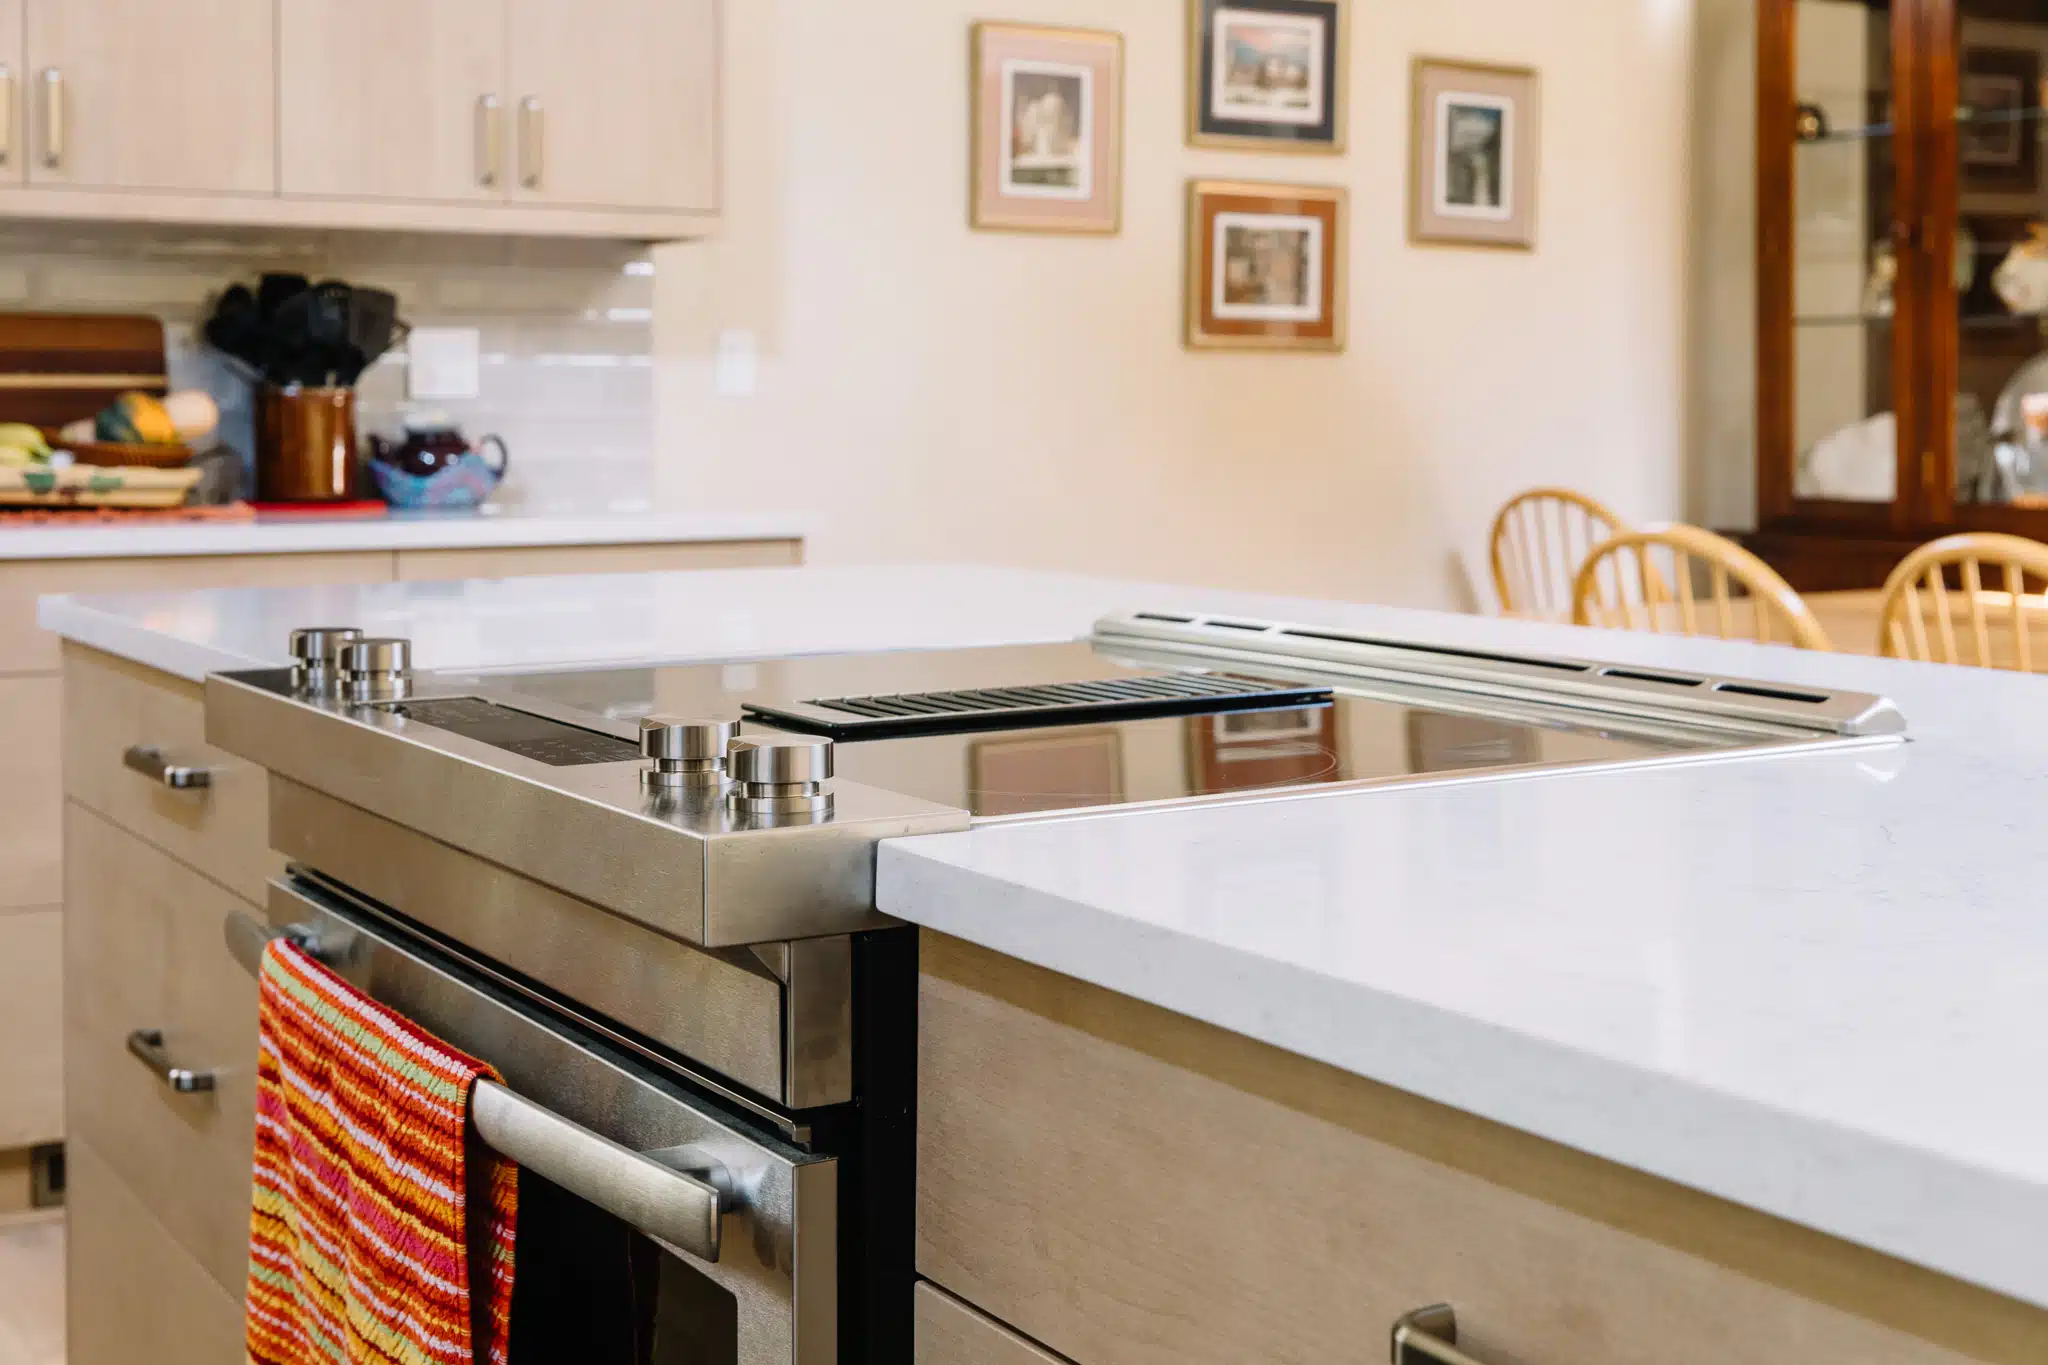
The range is the Jennair Euro-Style 30″ Electric Downdraft Range.
The refrigerator is the GE Profile Counter-Depth Fingerprint Resistant French Door Refrigerator.
Trade Partners
We’ve been developing relationships with quality trade partners for years. We tend to use the same subcontractors because we trust their work and have developed a great working relationship with them. This helps keep our projects running smoothly.
Demo:Matheson Construction and Demolition
Plumbing: Capital Plumbing Contractors
Electric: Truevolt
Carpetry: CTR Custom Cabinet Built-Ins and Trim
Drywall: Hawkins Drywall
HVAC: Watts Cooling Heating and Plumbing
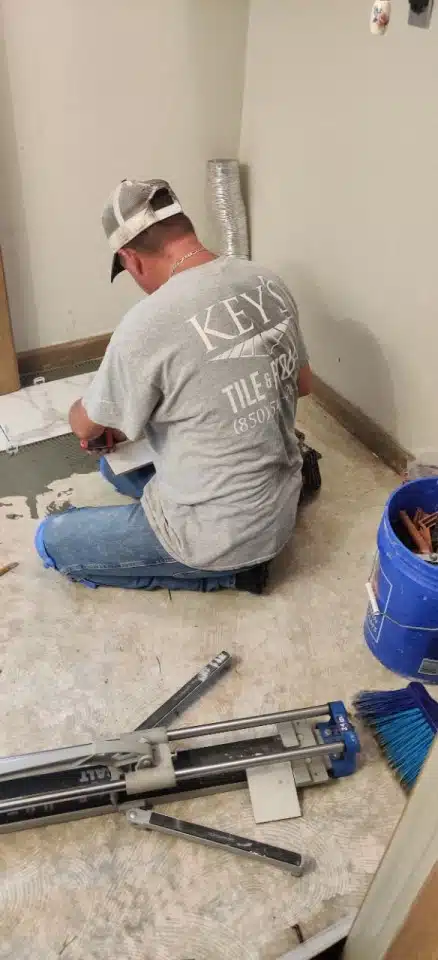
Tile: Keys Tile
Painting: A Different Stroke By Kenneth